Step 1: Generate MoMoProxy
1. Visit MoMoProxy website to register an account.
2. Login to the dashboard and buy a proxy plan. (rotating residential proxies or static residential proxy)
3. Generate Proxy after click "rotating residential" -> "use proxy". select location as USA, California, and others. click "generate" to get the details of Proxy Server IP, Port, Username, and password.
4. Copy the proxy detailed information.

Step 2: Configure Xlogin Browser to Use the Proxy
1. Visit XLogin‘s official website to download the client and register the account. (Support a 3-day Free Trial)
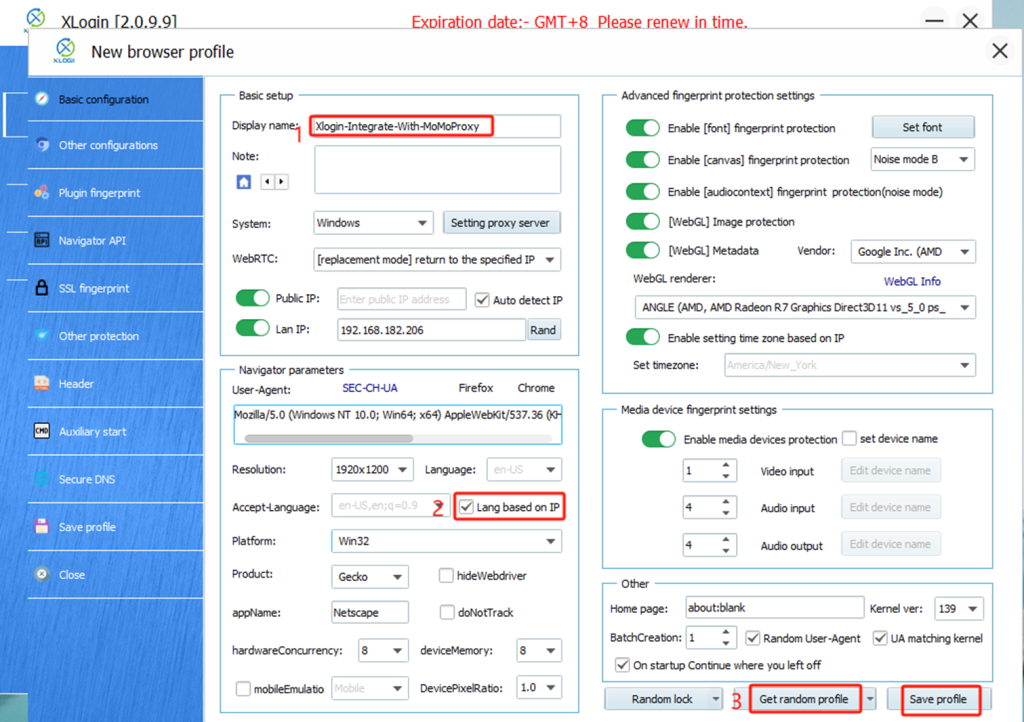
2. Create or Edit a Profile: Open Xlogin Browser client, click "create profile", name it, and select "language based on IP", and "get random browser", and save the profile. all the steps showed as following screenshot:
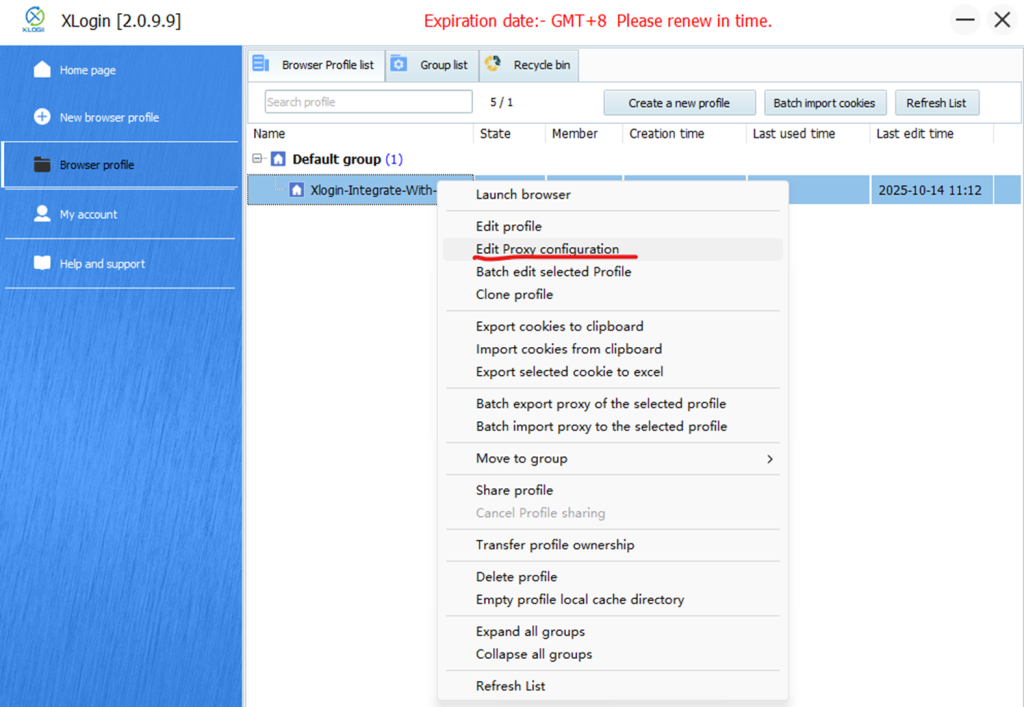
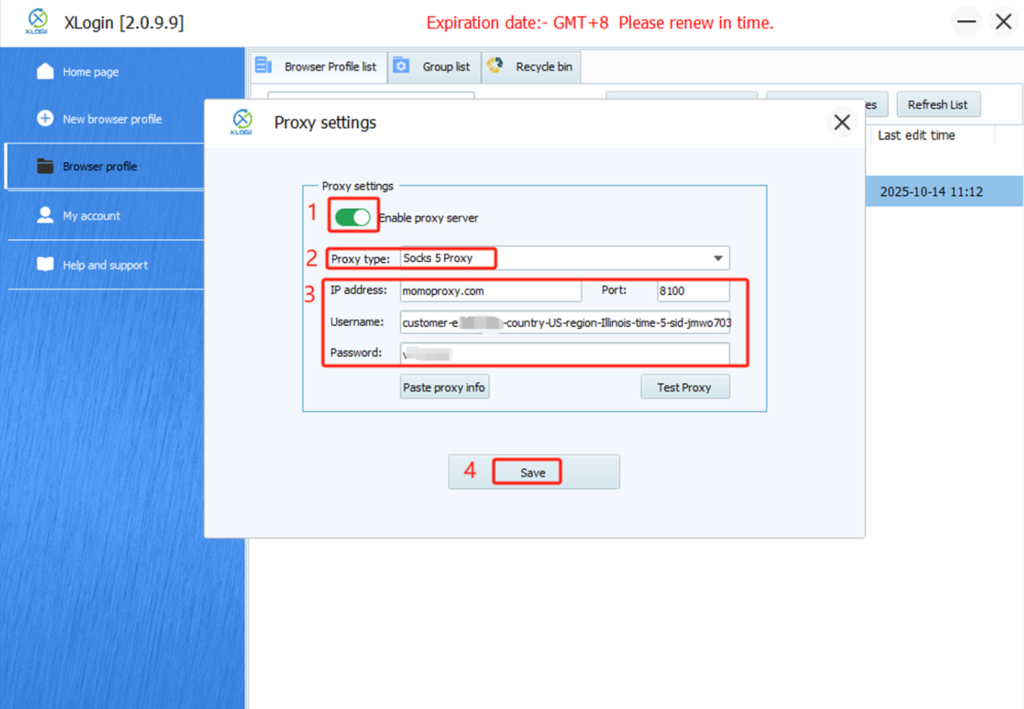
3. Proxy Settings: In the profile list, right click the profile you want to setup proxy, and select "Edit Proxy" to open the proxy windows. and Open the proxy.
4. Paste the proxy details copied from MoMoProxy:
-- Proxy Type: SOCKS5 or HTTPS ( MoMoProxy Supports HTTP(S) and SOCKS5 Proxy protocol).
-- Host: (or the IP where MoMoProxy is running).
-- Port: 8100 (or the port you configured for MoMoProxy).
-- Username: ****
-- Password: ****
5. Save the Profile: Apply the settings and launch the browser profile.
Step 3: Verification and Testing
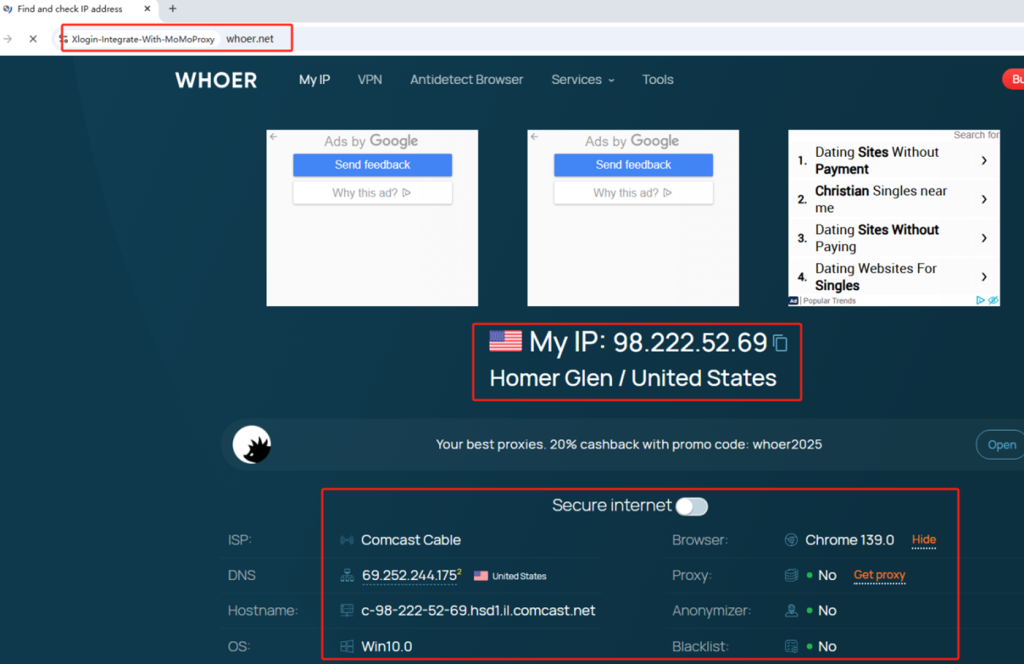
The integration is now complete. To verify it's working:
Check Your IP: Inside the launched Xlogin Browser window, navigate to a site like whoer.net. The IP address shown should be the one from the proxy pool managed by MoMoProxy, not your real IP.
Note: XLogin browser does not provide built-in proxy IP services. Users must purchase proxies from third-party providers. Proxy setup tutorials are offered by these third parties and are not affiliated with XLogin. Any illegal or criminal activity conducted through XLogin is strictly prohibited, and users bear full responsibility for any consequences.