Buying Private Proxies:
1. To begin with, visit PrivateProxy.me and register a new account or sign in with an existing one.
2. Next, you must select all the necessary settings for your proxy server by clicking the "Buy Proxies" button. For instance, you can choose the package, type, and country.
3. After that, you can select the "My Proxies" tab from within your account. All of the credentials you’ll need for your additional connections are available here.
Setting Up Proxies in XLogin Browser:
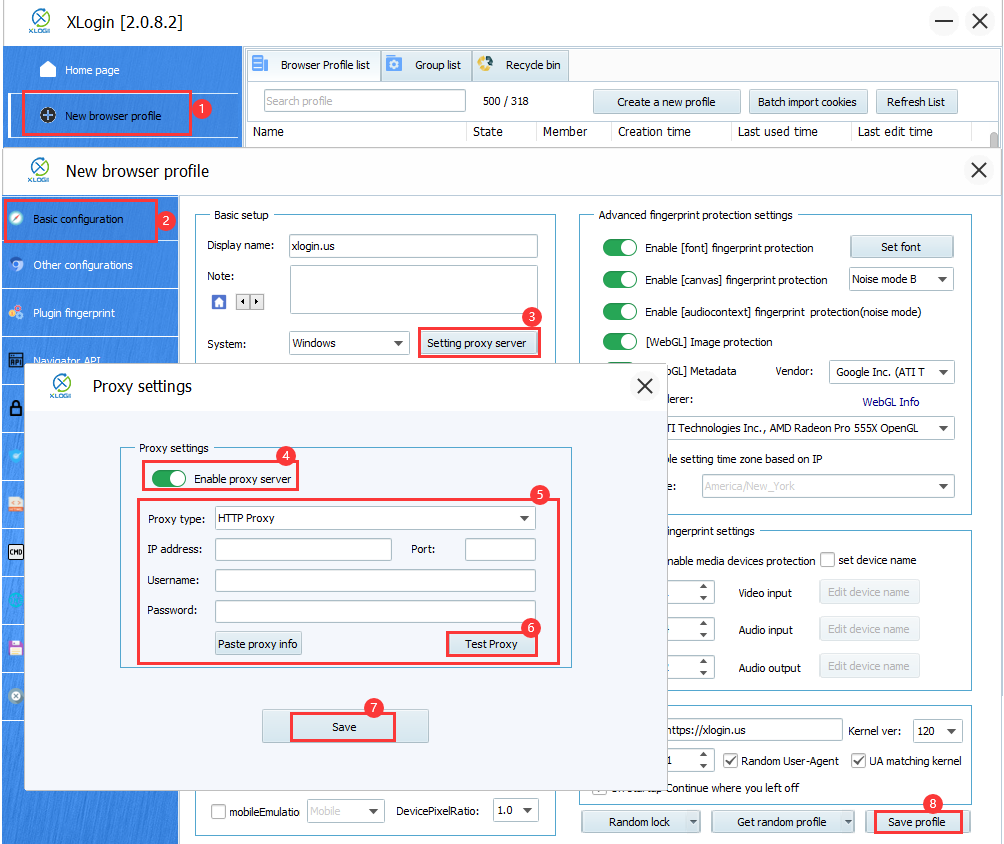
Now that we have all the connection-related data, we can begin configuring the XLogin browser with a proxy.
1. Create a new profile after downloading the XLogin Browser. Click the "Setting proxy server" button after making all the necessary selections.
2. For the connection to the proxy server, you can now choose the connection type and add a password, username, IP address, and port.
3. After that, you can click the "save" button and test the newly added proxy server.
You are now ready to use your new XLogin browser profile with a proxy, with all of these settings set.
Note: XLogin browser software itself has no proxy IP service, users need to purchase proxy IP from a third party. Proxy-related tutorials are provided by third-party platforms and are not related to the XLogin. Users are strictly prohibited from using XLogin to engage in any illegal and criminal activities, and users are responsible for the relevant responsibilities caused by using XLogin.