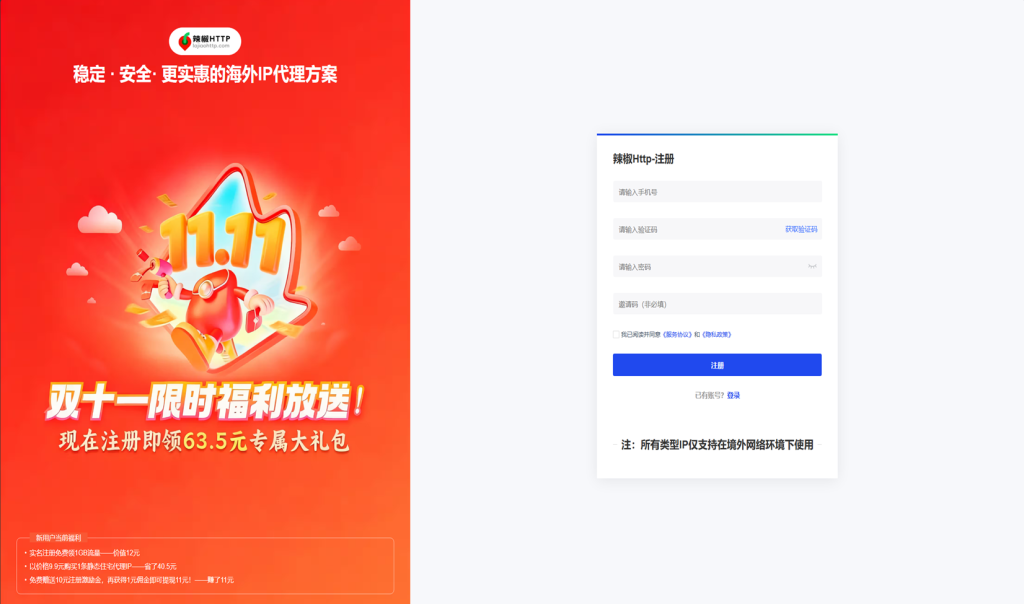
1. Register LajiaoHTTP.
By signing up for LajiaoHTTP using the invitation code lajiao666, you can receive a limited-time bonus of 1.5GB overseas residential proxy data plus an exclusive user gift package worth ¥63.5!
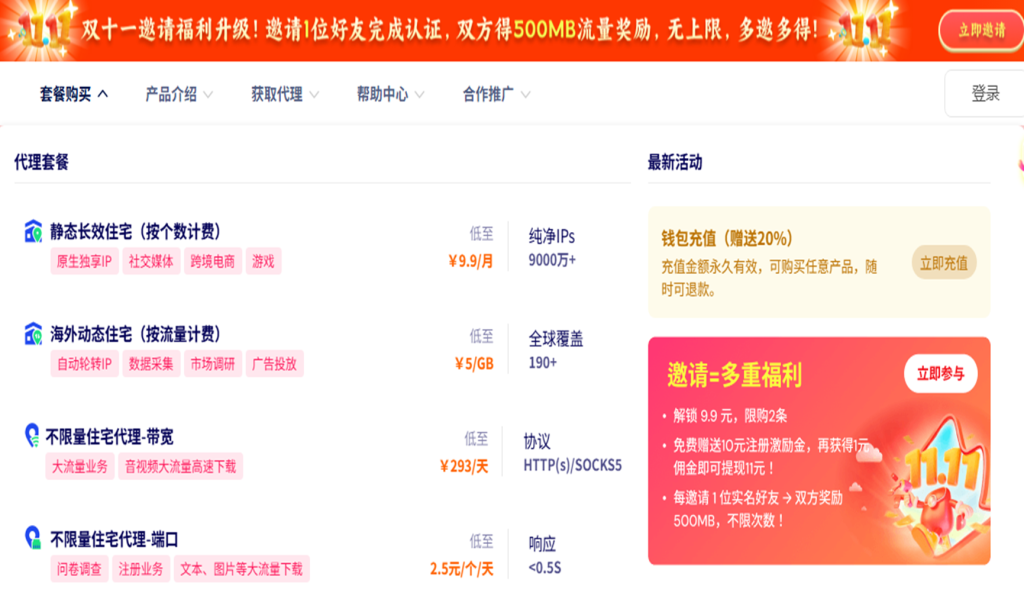
2. Purchase the typr of proxy you need.
3. Complete identity verification and obtain the proxy.
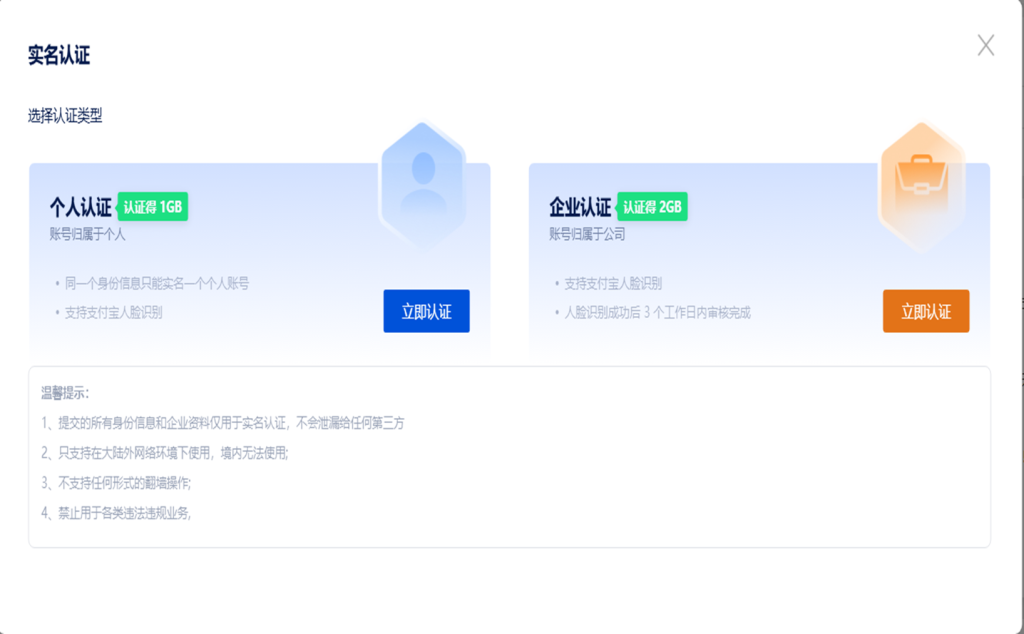
After completing identity verification, individual users can receive 1GB of overseas dynamic residential proxy data for free, while enterprise users can receive 2GB for free by providing a business license.
4. Configure the Proxy.
Using Overseas Dynamic Residential Proxies as an Example: How to Configure LajiaoHTTP Proxies in the XLogin Anti-Detection Browser
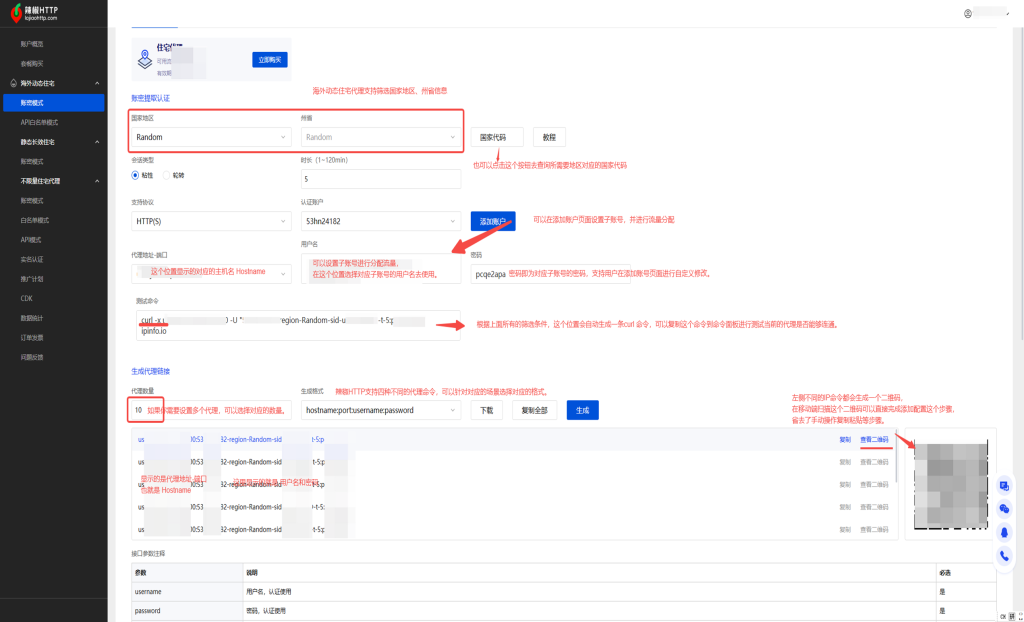
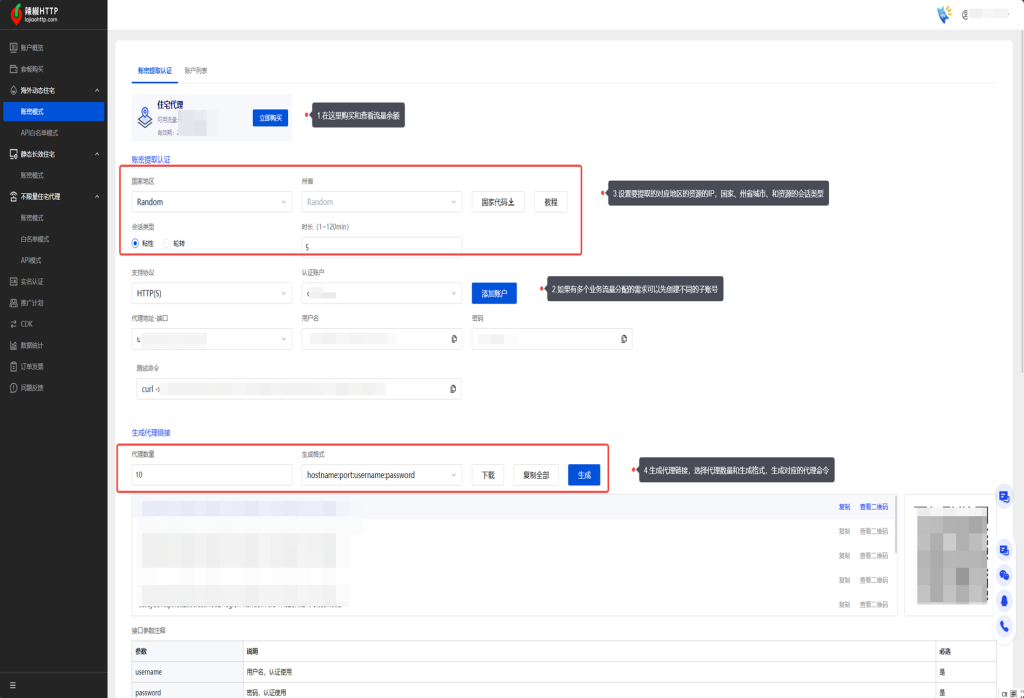
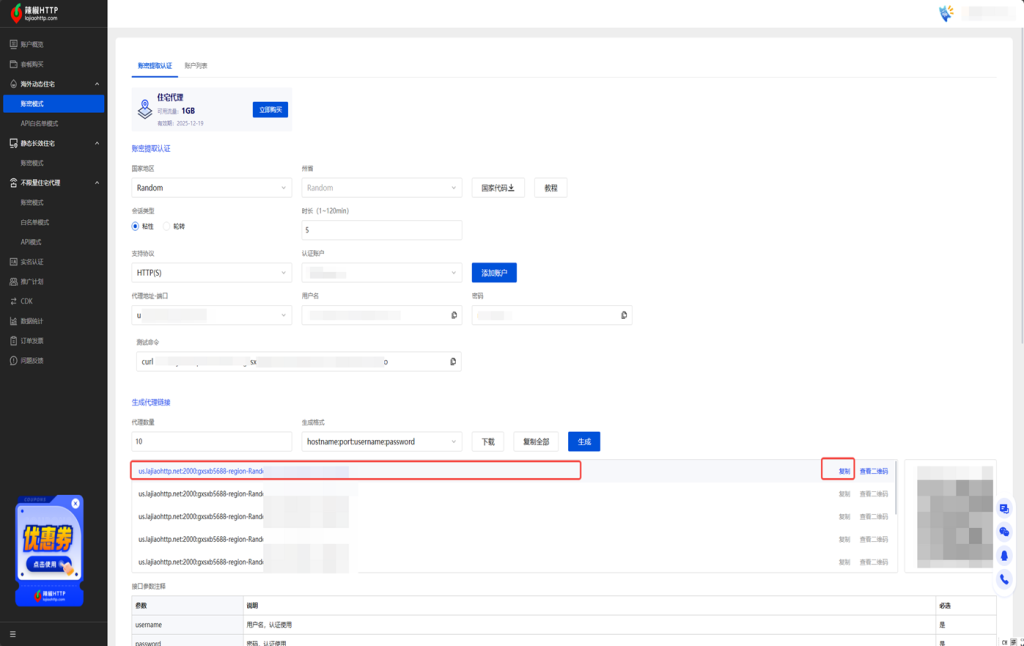
Under the Dynamic Residential Proxy – Username/Password Mode menu, you can extract the proxy details.
1. You can view the remaining residential proxy traffic balance for your account.
2. LajiaoHTTP allows users to create sub-accounts, enabling precise traffic allocation and better business management by assigning different amounts of traffic to each sub-account.
3. After creating a sub-account, return to Username/Password Mode and filter the resource settings you need, such as country, state/province, and session type:
3.1 Session Type – Sticky: When using sticky mode, you must set the desired IP retention time. LajiaoHTTP currently supports 1–120 minutes for dynamic residential proxies. This means the extracted IP will remain unchanged for the selected duration.
3.2 Session Type – Rotating: Rotating mode does not require setting a retention time. LajiaoHTTP will assign a new proxy IP for each request.
Choose the appropriate session type based on your specific business needs.
4. After selecting the geographic filters, you also need to configure the username/password format and the number of accounts to extract. LajiaoHTTP also provides a convenient QR code option, allowing mobile users to quickly scan and connect to the extracted IPs.
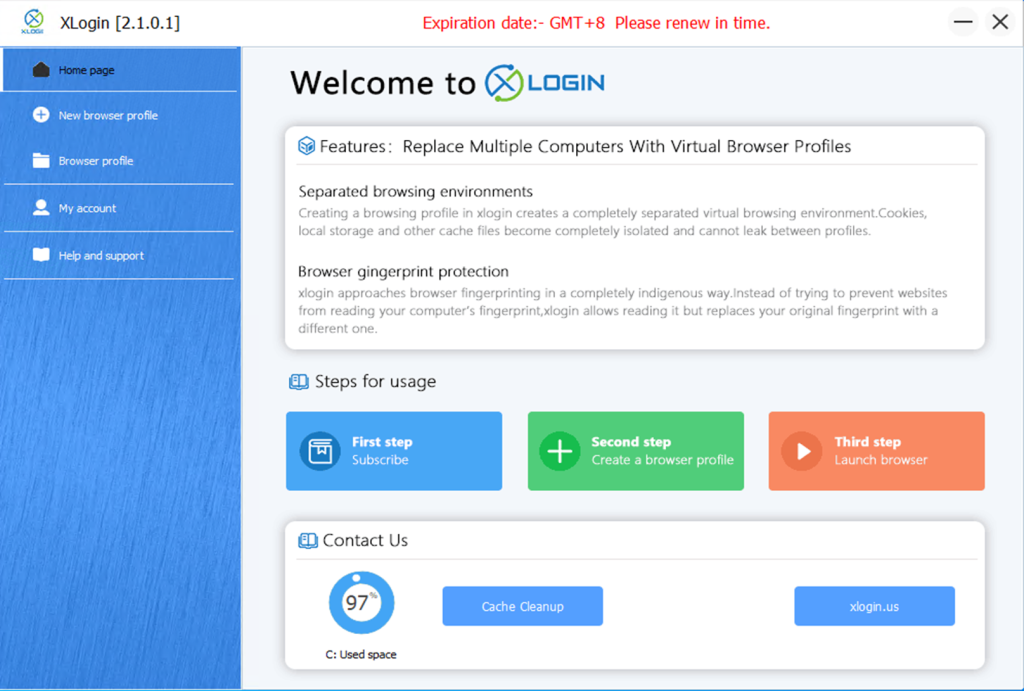
5. Download and Install XLogin. (3-day Free Trial)
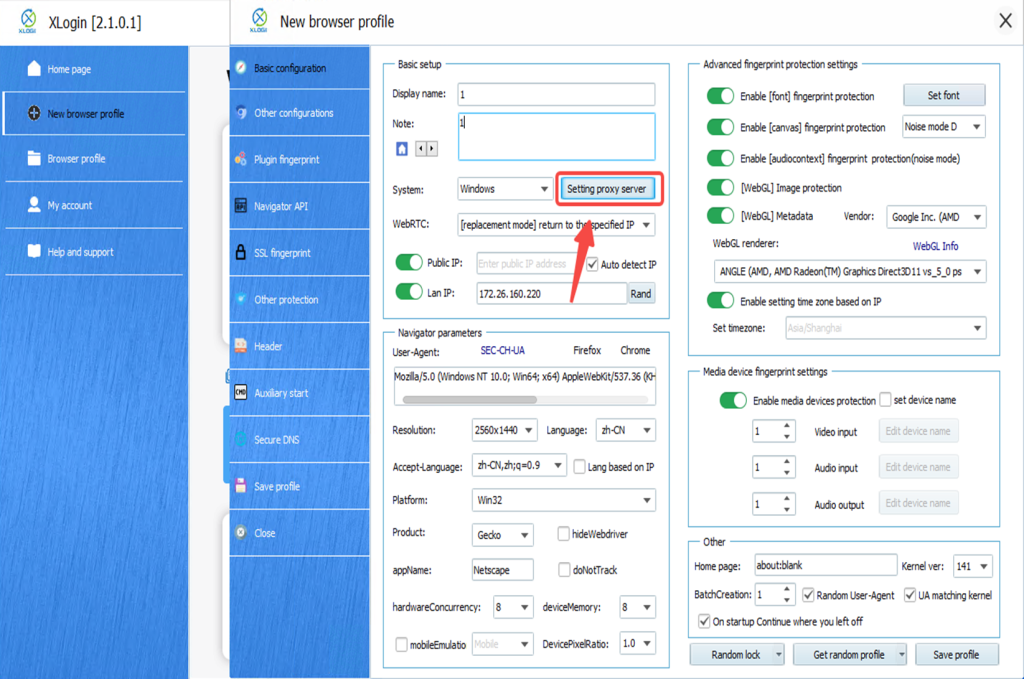
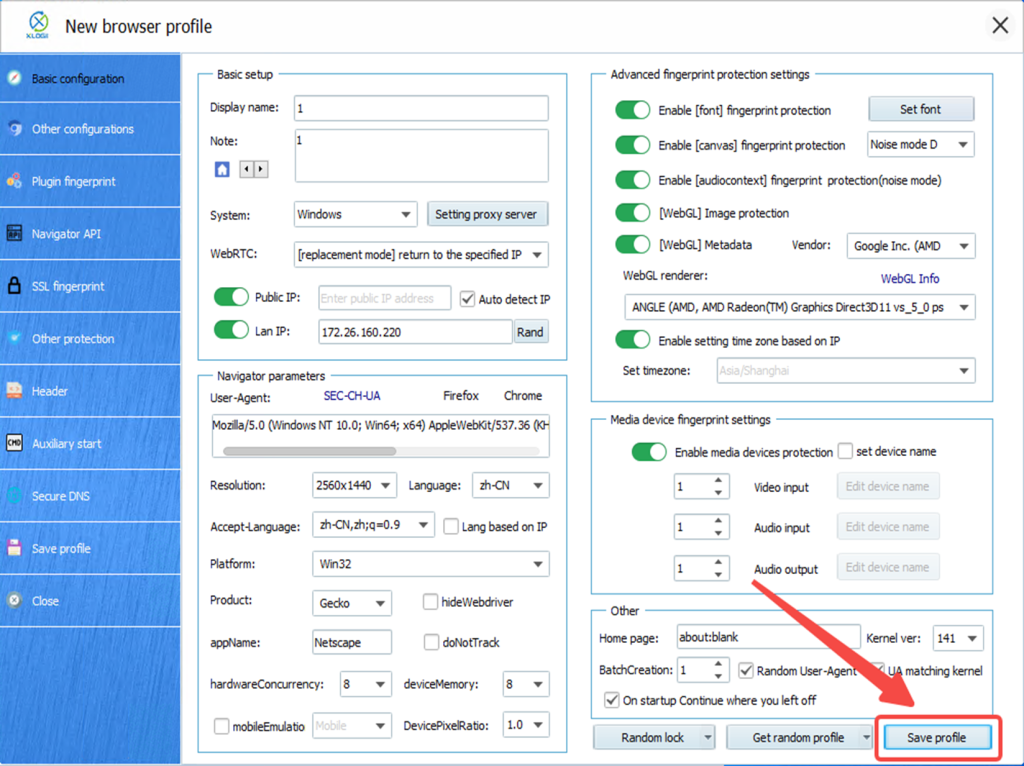
5.1 Click “Create New Browser Profile.”

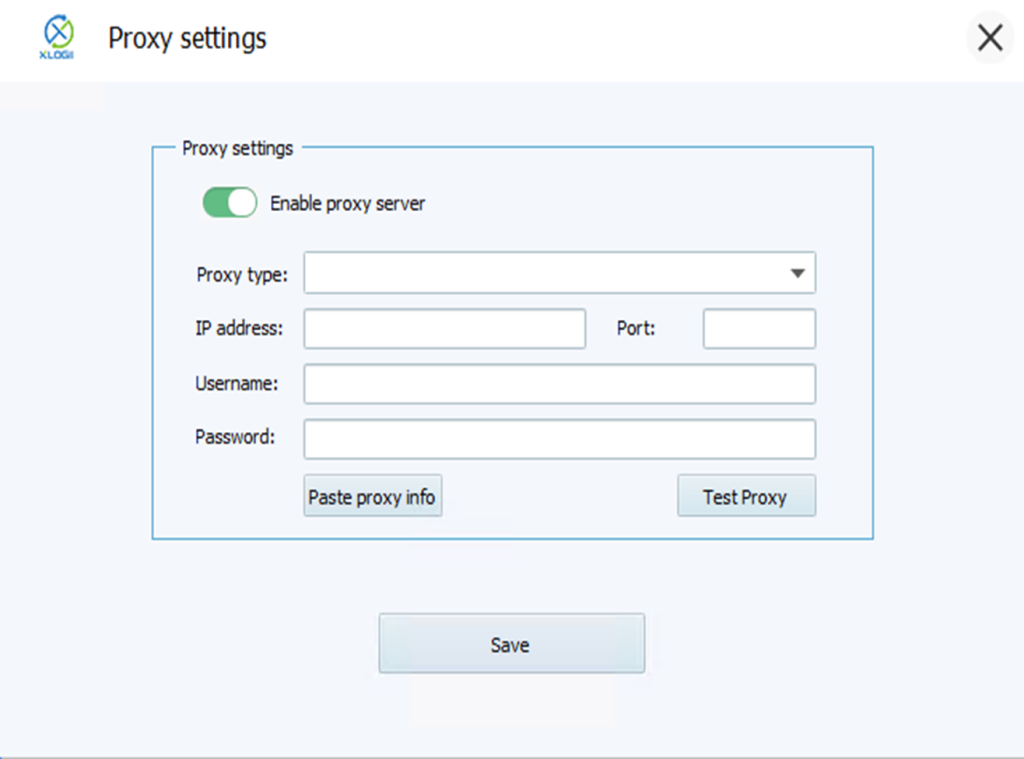
5.2 After clicking “Create New Browser Profile,” a new pop-up window will appear.Once you have set the display name and remark information, click the “Set Proxy Server” button shown in the image.
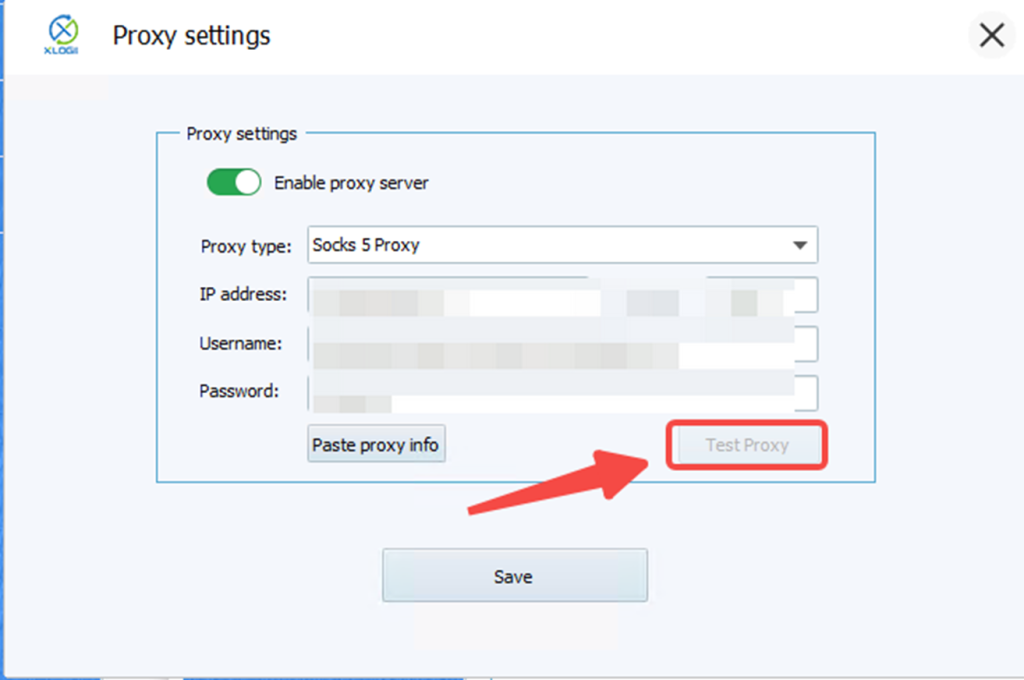
5.3 In the proxy server settings pop-up window, you will see fields such as proxy type, IP address, port, username, and password. Enable the proxy server option, then paste the proxy details extracted from LajiaoHTTP into the corresponding fields.
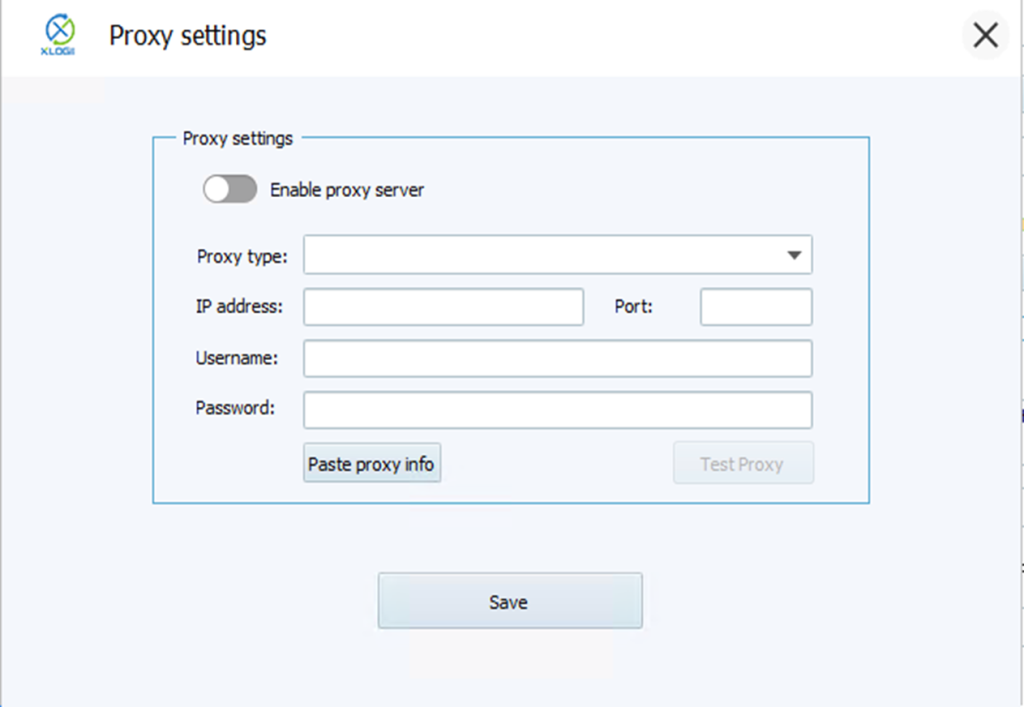
5.4 Click “Enable Proxy Server”.
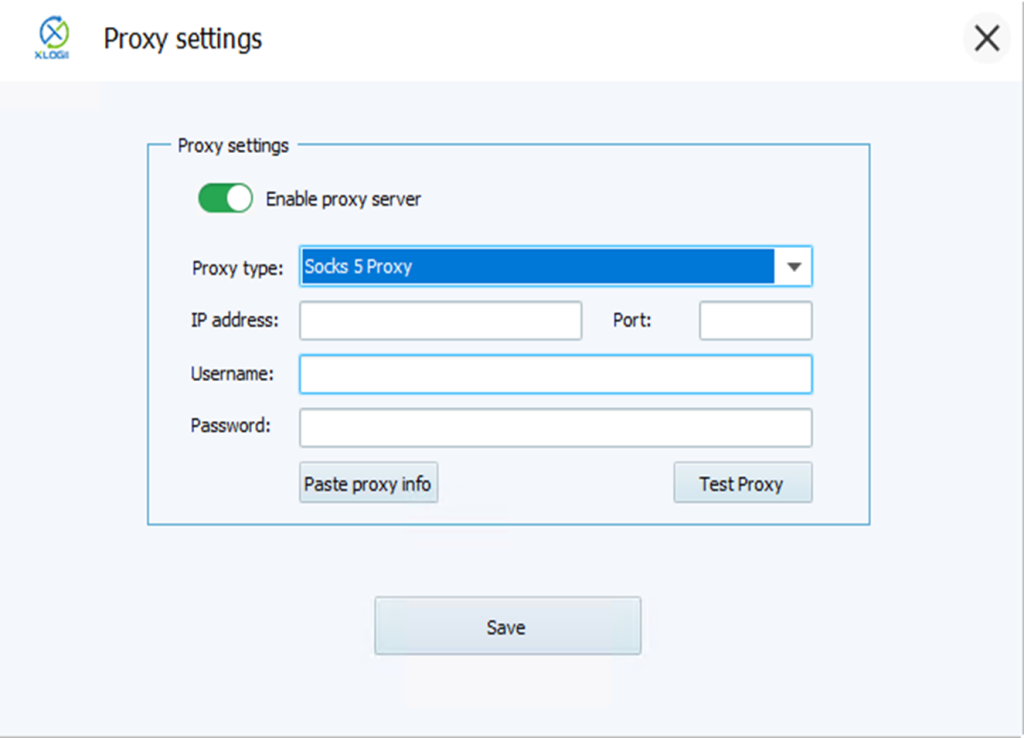
5.5 XLogin supports multiple proxy types, including HTTP, Socks4, Socks5, and HTTPS. Here, we select SOCKS5 because it is compatible with most proxy protocols and provides better anonymity.
5.6 Return to LajiaoHTTP and copy the extracted proxy credential information into XLogin.
5.7 After copying, there's no need to fill in each field manually. Simply click the “Paste Proxy Info” button in XLogin, and the copied credential string will be automatically parsed and filled into the corresponding fields.
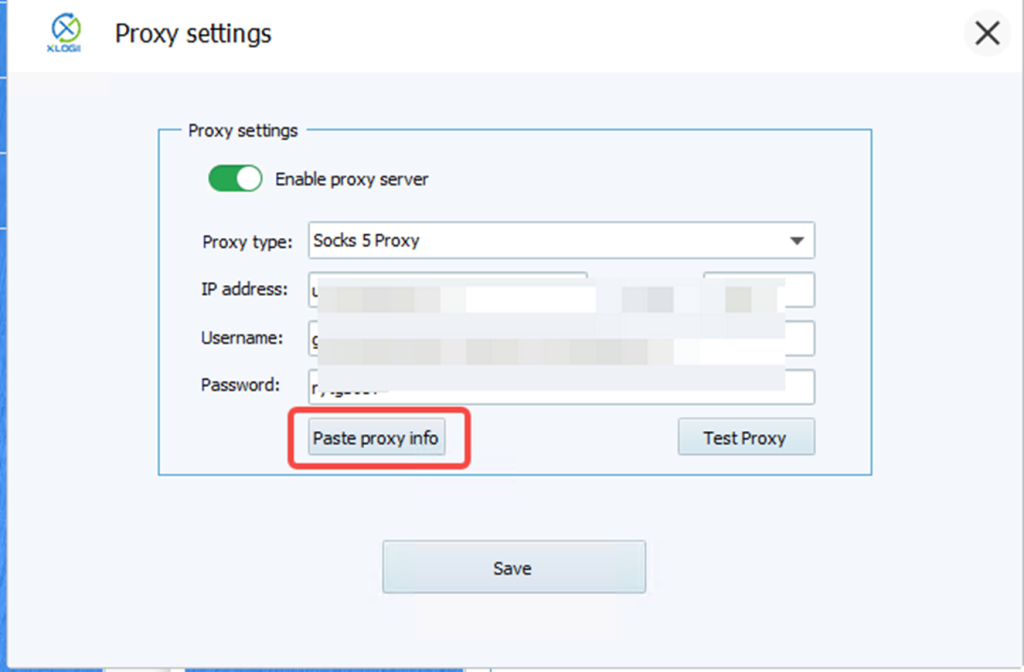
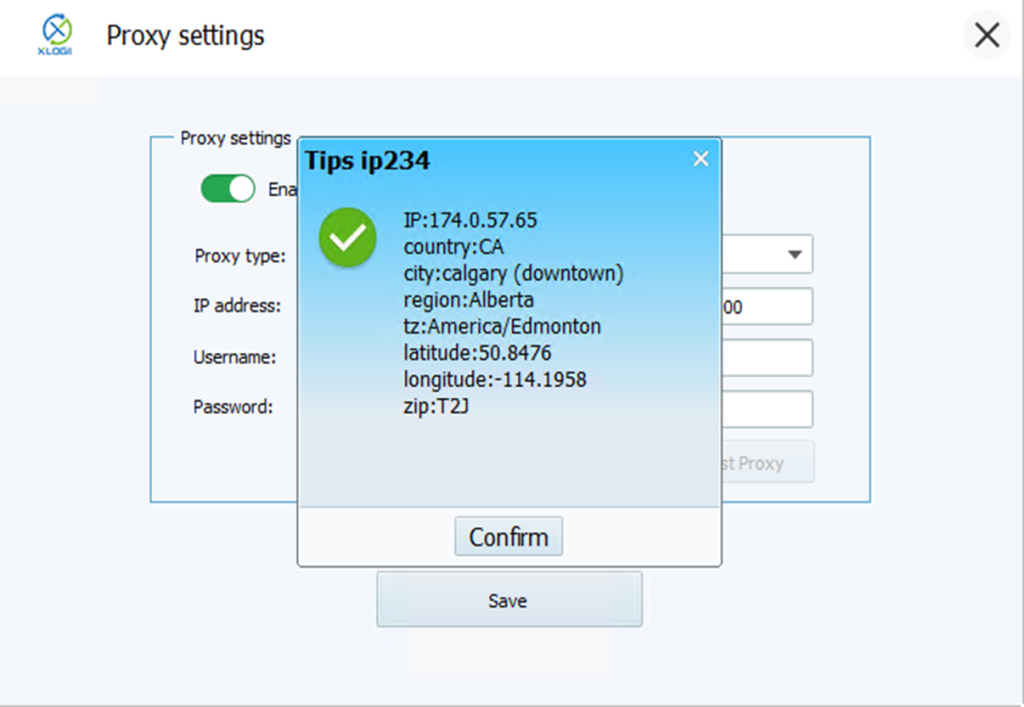
5.8 After completing the setup, click “Test Proxy.”If a green popup appears and displays detailed IP information, it means the extracted IP is working properly. Otherwise, the connection has failed, and you will need to switch to another proxy.
5.9 After completing the setup, click “Save Configuration” to finish the browser’s proxy configuration.
Note: XLogin browser does not provide built-in proxy IP services. Users must purchase proxies from third-party providers. Proxy setup tutorials are offered by these third parties and are not affiliated with XLogin. Any illegal or criminal activity conducted through XLogin is strictly prohibited, and users bear full responsibility for any consequences.