Step1: Register & purchase your nstproxy account
1. Go to Nstproxy Official Website and sign up or log in
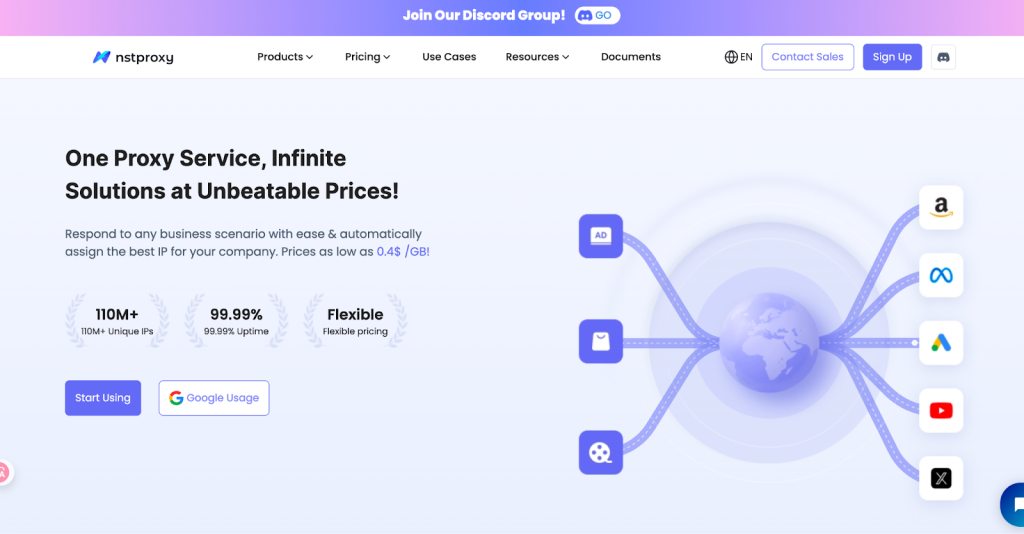
2. Choose your desired proxy type from Nstproxy (Residential, Datacenter, ISP) and complete your purchase. (Use bonus code:XLOGIN get 10%off )。
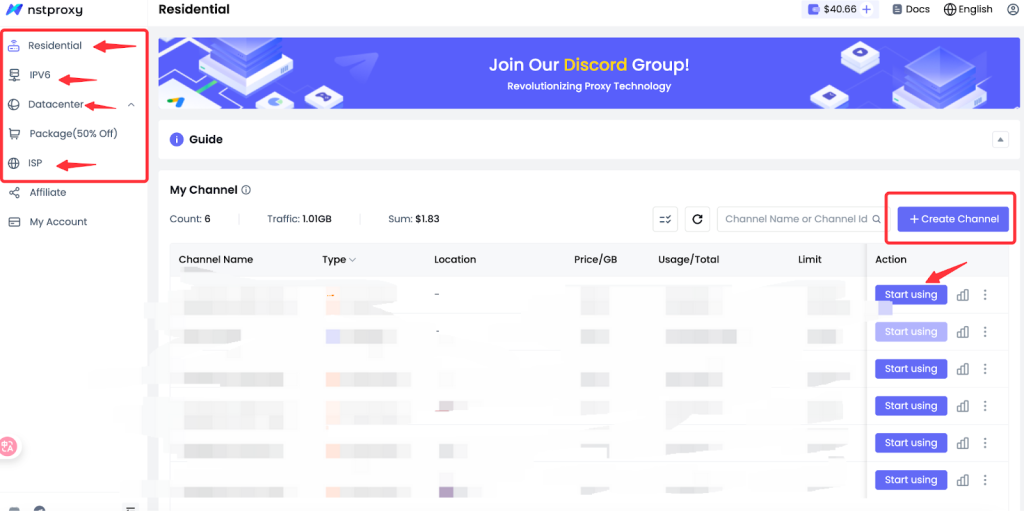
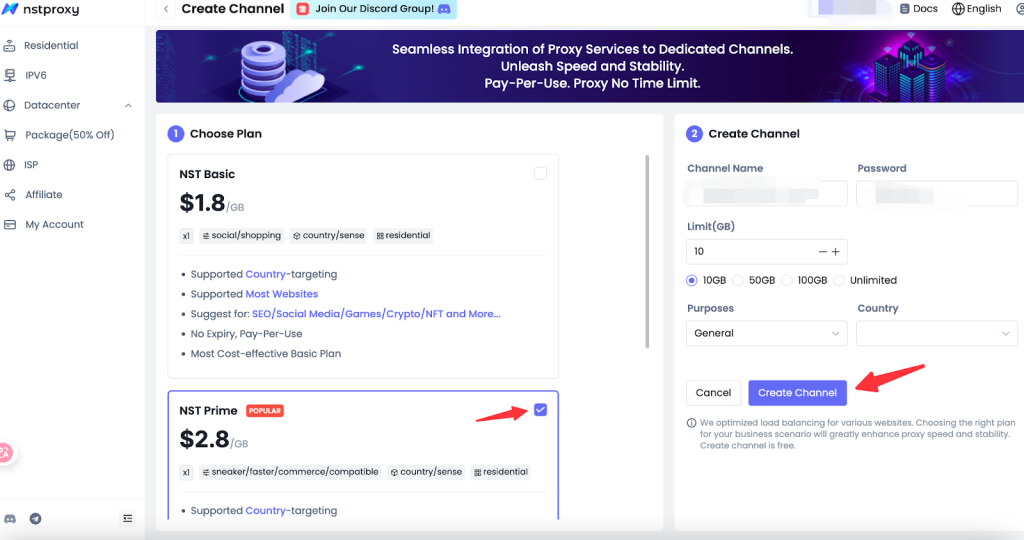
3. After purchasing, go to your Nstproxy Dashboard → “My Proxies” to obtain your proxy credentials (IP/Port, Username & Password).
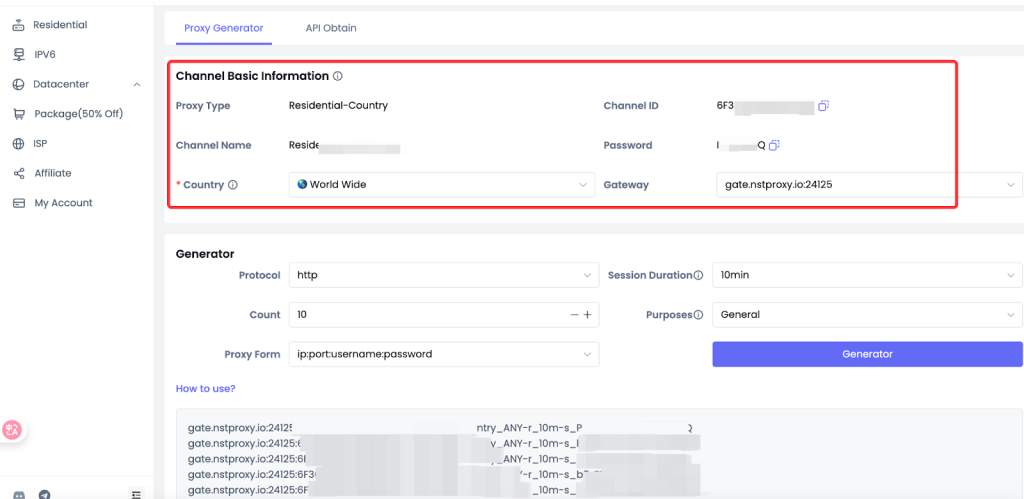
Sample:
D3B153E4F8170622-residential-country_US-r_30m-s_abc123:[email protected]:24125
Step2: Open XLogin & Create a New Browser Profile
1. Launch XLogin on your computer and log in to your account (Support 3-day Free Trial).
2. In the sidebar, click “New Browser Profile.”
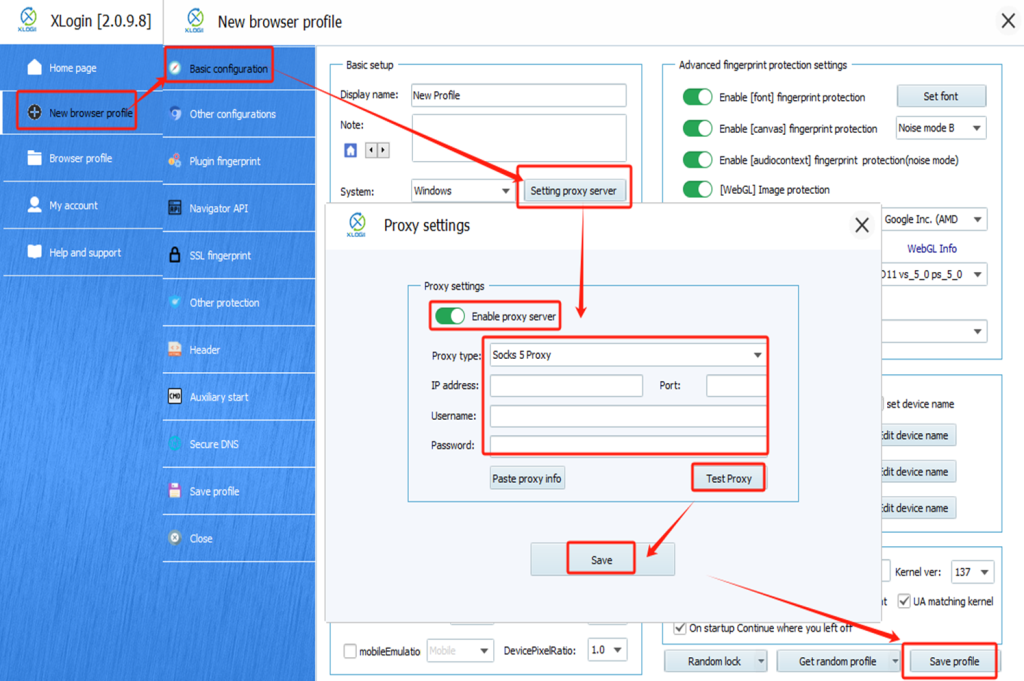
3. Set Proxy in the Browser Profile
1)Within the profile creation window, find and click “Setting Proxy Server.”
2)Toggle “Enable Proxy Server” to ON.
3)Fill in the proxy details from your Nstproxy account:
- Host/IP: e.g. gw-us.nstproxy.io
- Port: e.g. 24125
- Username: your-nstproxy-username
- Password: your-nstproxy-password
4. Click the “Test Proxy” button.
If the test returns the correct IP or location, the proxy is configured correctly.
5. Click “Save” to complete the proxy setup.
Step3: Launch & Verify the Browser Profile
1. Back on the browser profile list, select your recently configured profile and click “Launch Browser.”
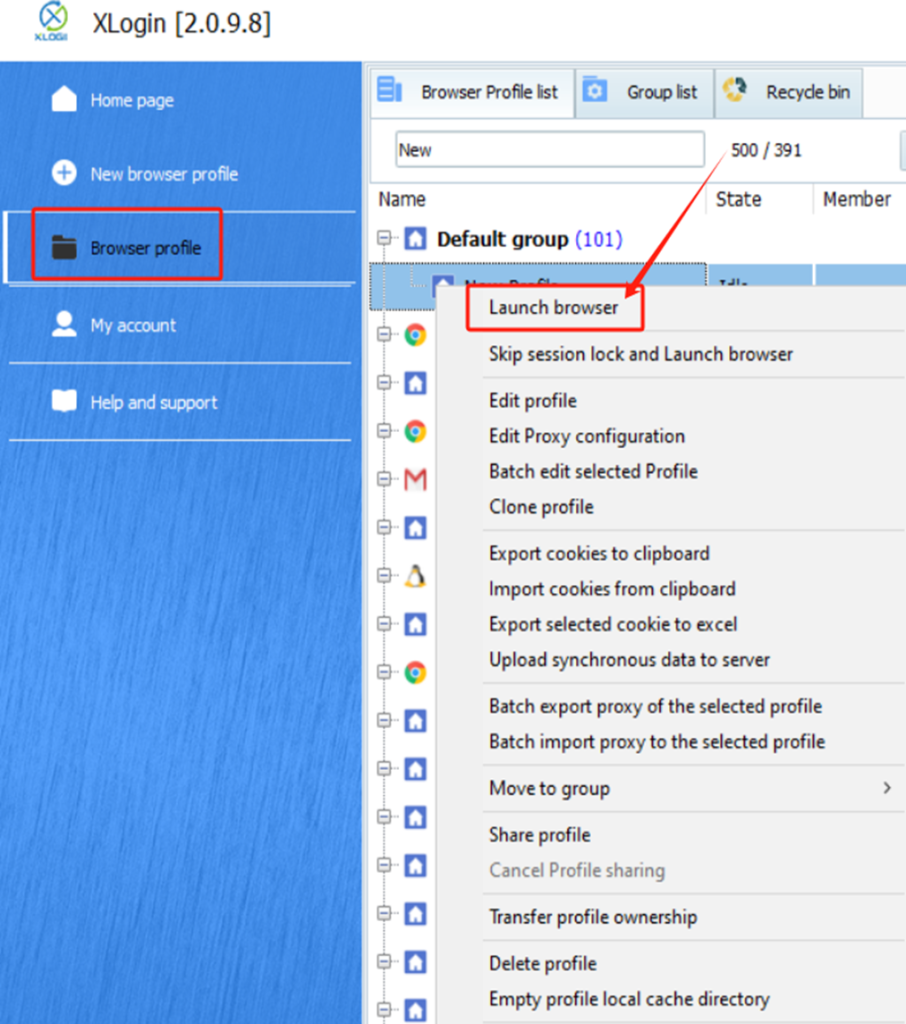
2. Once the browser opens, navigate to a site like https://api.ip.cc or https://ipapi.co/json to verify that the IP corresponds to the proxy location you chose.
If everything works, you’re ready to browse using the profile with Nstproxy routing.
Step4: Best Practices & Tips
- For tasks requiring low detection risk (multi-account management, automation), choose Residential or ISP Proxies from Nstproxy.
- Avoid using the same proxy across many profiles simultaneously — assign unique proxies per profile for better isolation.
- If you encounter IP-block or handshake errors, try rotating to a different location or use sticky sessions.
- Ensure your browser fingerprint settings in XLogin (timezone, screen resolution, WebGL) match the proxy location.
- Monitor proxy performance and change endpoints if latency or connection issues occur.
- Store your proxy credentials securely and avoid sharing them across multiple users.
✅ Summary
By following the steps above, you’ll integrate an Nstproxy endpoint seamlessly into a XLogin browser profile.
This setup enables you to run isolated browser sessions with unique IP addresses — ideal for e-commerce, social media automation, web scraping, and more.
👉 Get started now with Nstproxy + XLogin and elevate your proxy workflow!
Don’t forget use bonus code:XLOGIN get 10%off
Note: XLogin browser does not provide built-in proxy IP services. Users must purchase proxies from third-party providers. Proxy setup tutorials are offered by these third parties and are not affiliated with XLogin. Any illegal or criminal activity conducted through XLogin is strictly prohibited, and users bear full responsibility for any consequences.