1. Open the website of Proxywing.
2. Sign up or log in to your account.
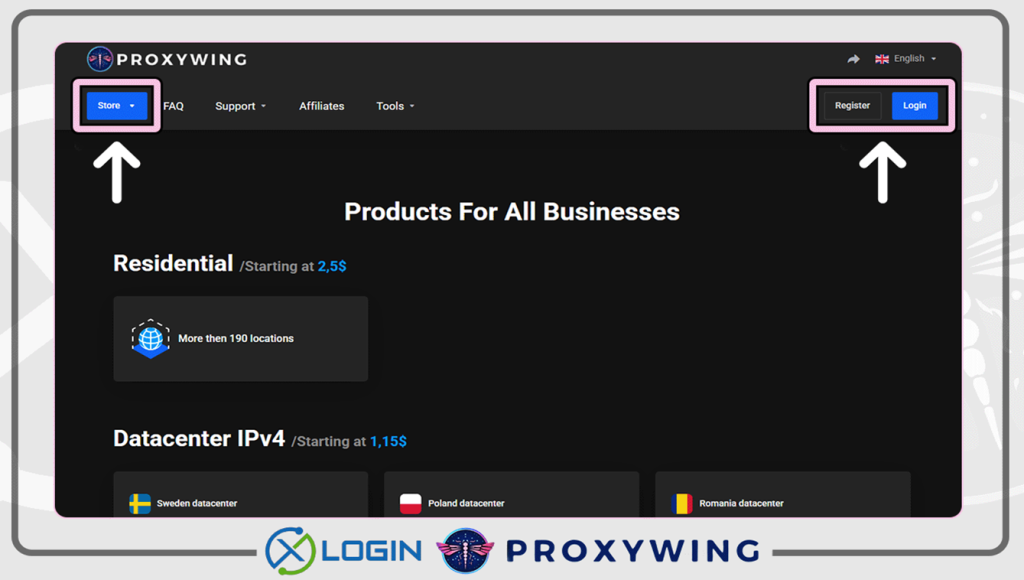
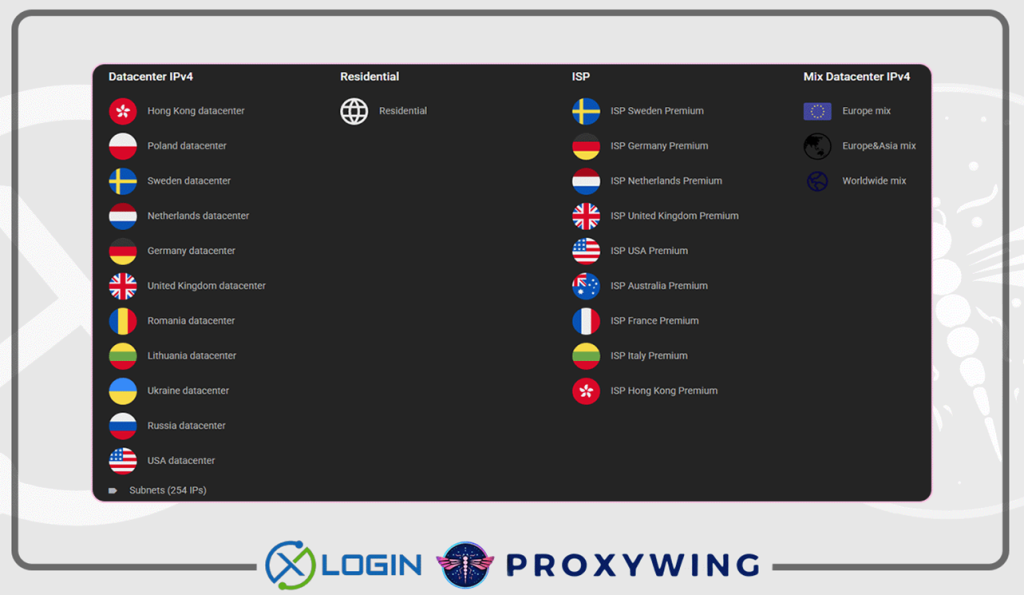
3. Click on "Store", select the required proxy type (residential, datacenter, or ISP) and add it to the shopping cart. After payment, the necessary proxies will immediately appear in your dashboard.
Resident traffic proxies: High-quality IP addresses from Internet service providers. In this category, proxies are provided using the pay-per-traffic model.
Datacenter proxies: hosted on data center servers. Such addresses are not linked to real providers but to data centers, so they are completely static and fast.
ISP proxy: а hybrid type that combines the advantages of residential and datacenter proxies. IP addresses are provided by Internet service providers (as with resident ones), but they are completely static.
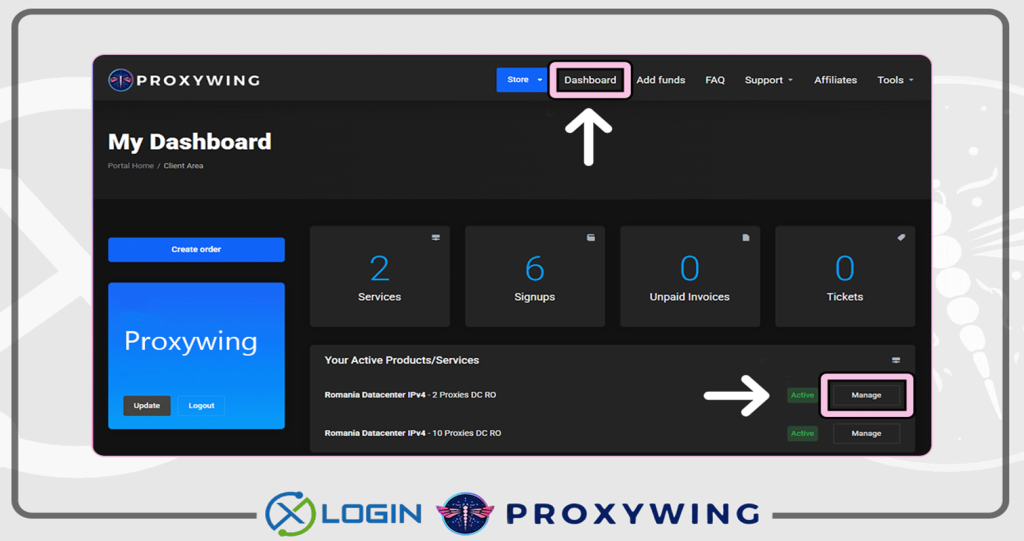
4. Open your dashboard, select a product, and click "manage".
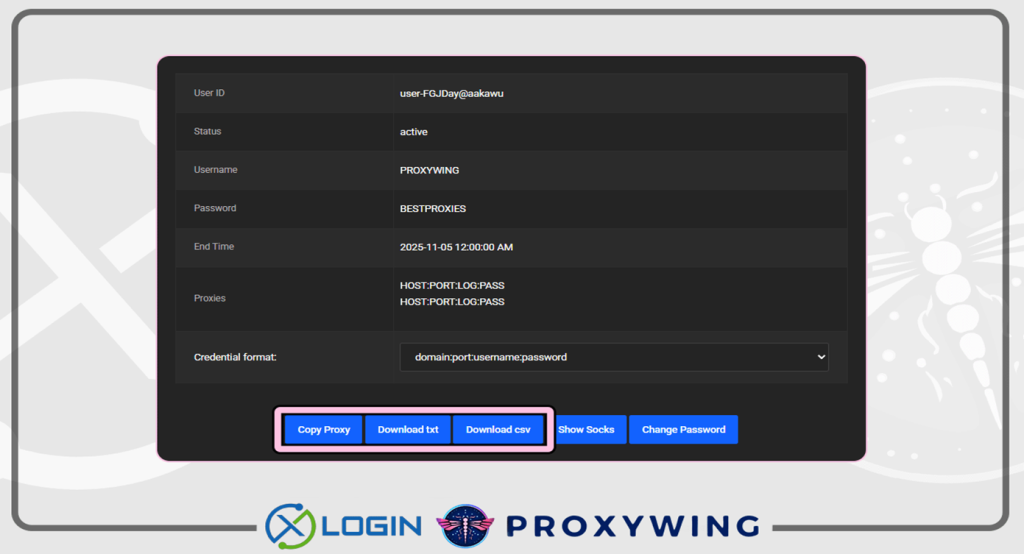
5. Copy or download the proxy using the buttons at the bottom.
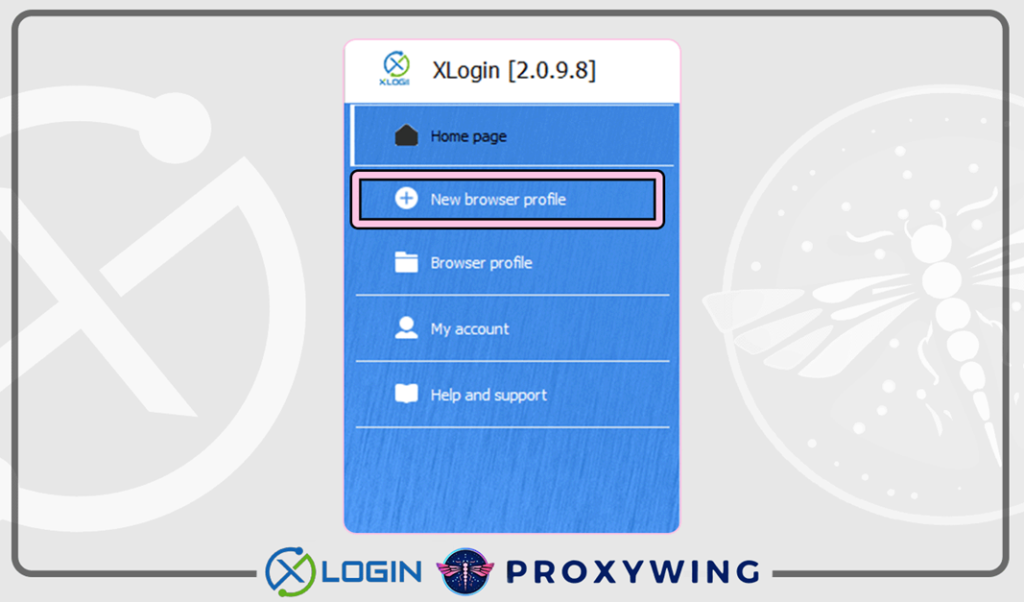
6. Open Xlogin Antidetect Browser, click "New browser profile" (Support 3-day Free Trial).
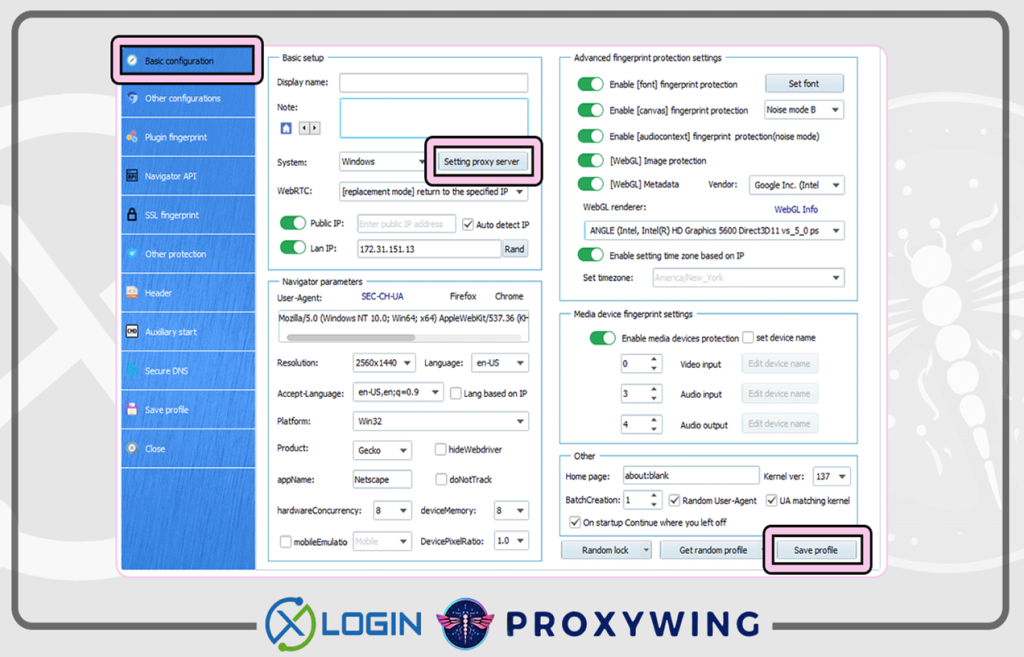
7. In the "Basic configuration" tab, click "Setting proxy server"
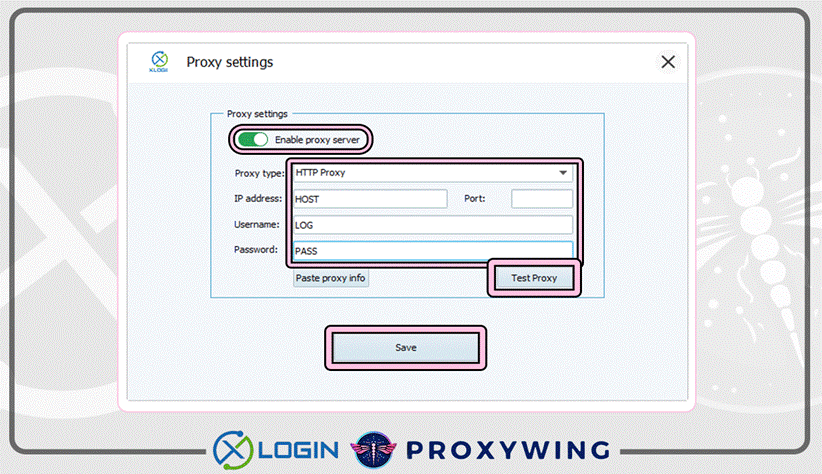
8. Select the proxy type. Proxywing’s proxies support SOCKS5 and HTTP connection. Enter the proxy data in the appropriate fields and click "Test Proxy"
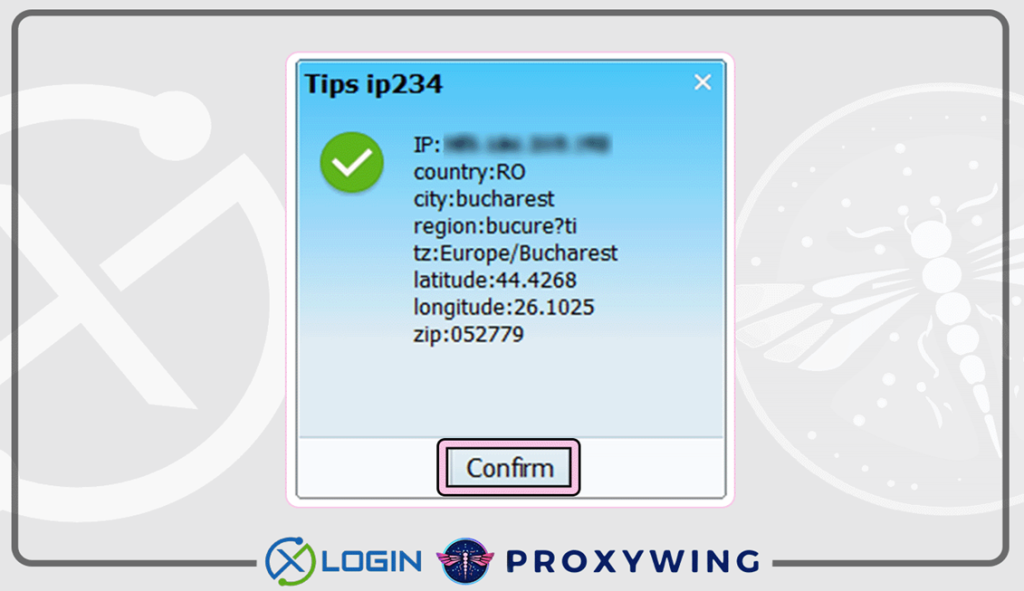
9. If you see a green check mark indicating the IP address, it means that the proxy is working. Click "Confirm" and save the proxy.
Note: XLogin browser has no proxy IP service, users need to purchase proxy IP from a third party. Third-party platforms provide proxy-related tutorials and are not related to the XLogin. Users are strictly prohibited from using XLogin to engage in any illegal and criminal activities, and users are responsible for the relevant responsibilities caused by using XLogin.