You can enjoy different proxy services at IP2World: Sock5 Residential Proxy & Rotation Residential Proxy.
Socks5 Residential Proxy:
Step 1: Click on the official website to download the IP2World software, and enter the account number and password to log in.
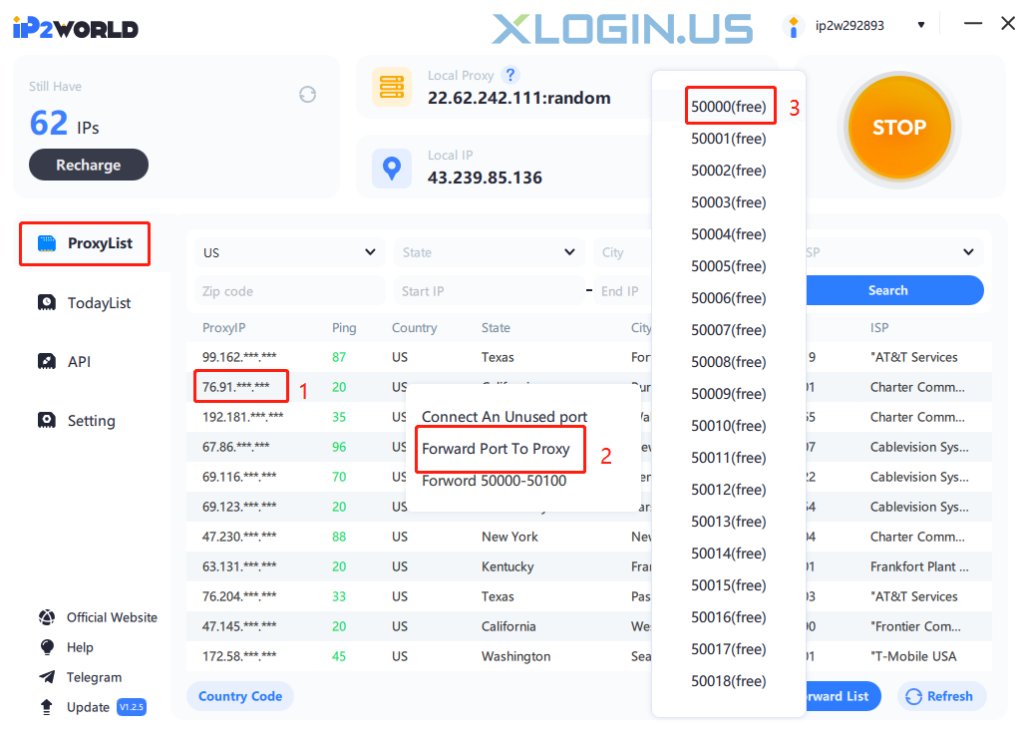
Step 2: After successfully logging in, click [OPEN], enter the corresponding address in [Country] [State] [City], and click [Search] to obtain the corresponding IP pool.
Step 3: In the ProxyList, select a proxy IP, right-click, and use [Forward Port To Proxy] to bind the IP to an unbound port.
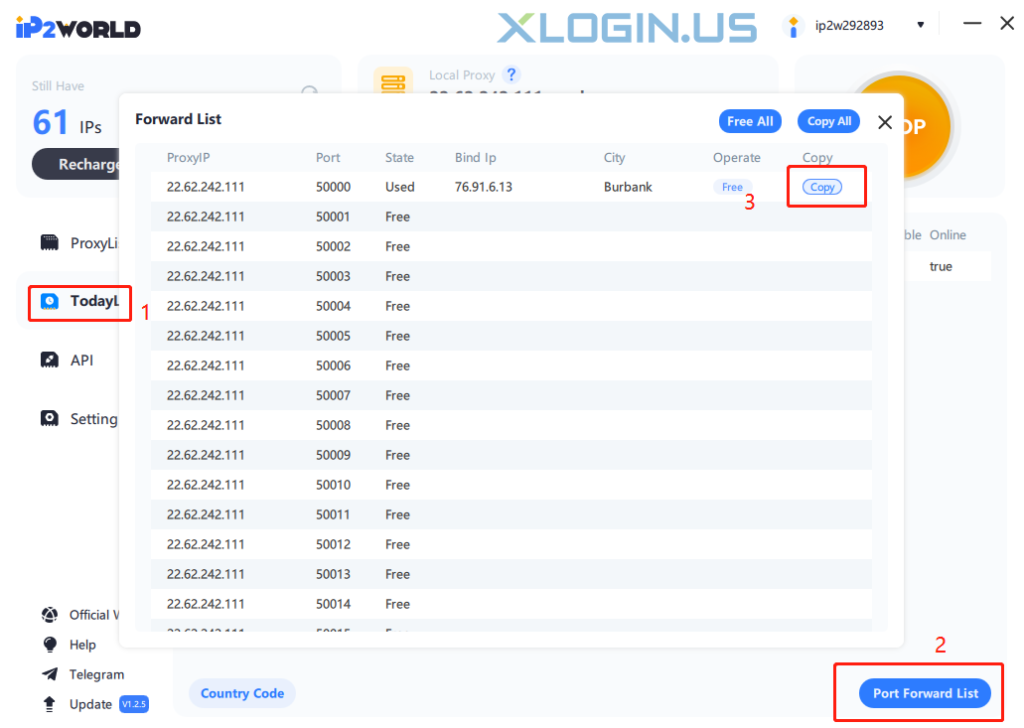
Step 4: In TodayList, click [Port Forward List] to copy the extracted IP and port.
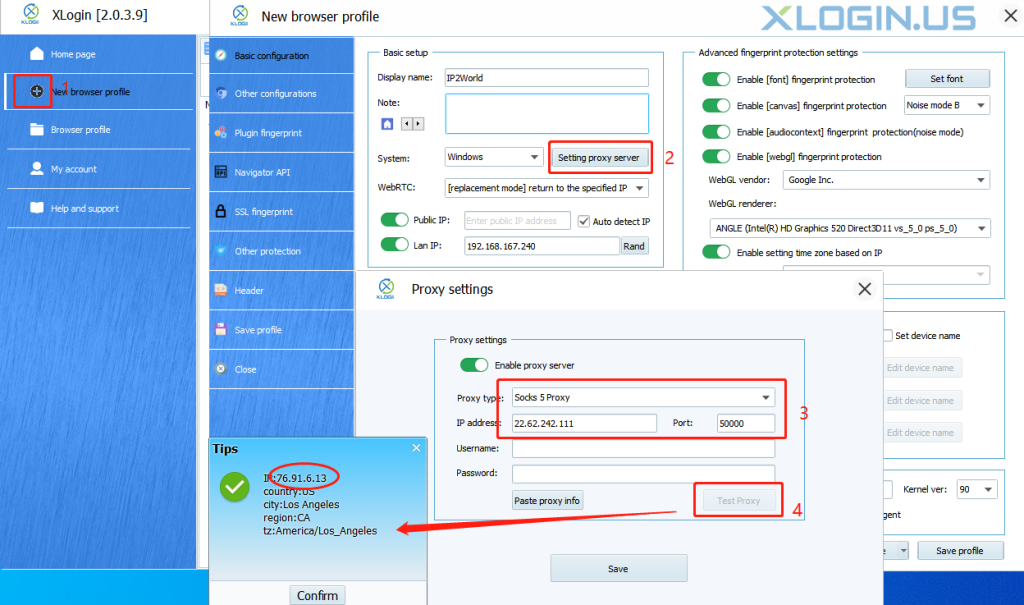
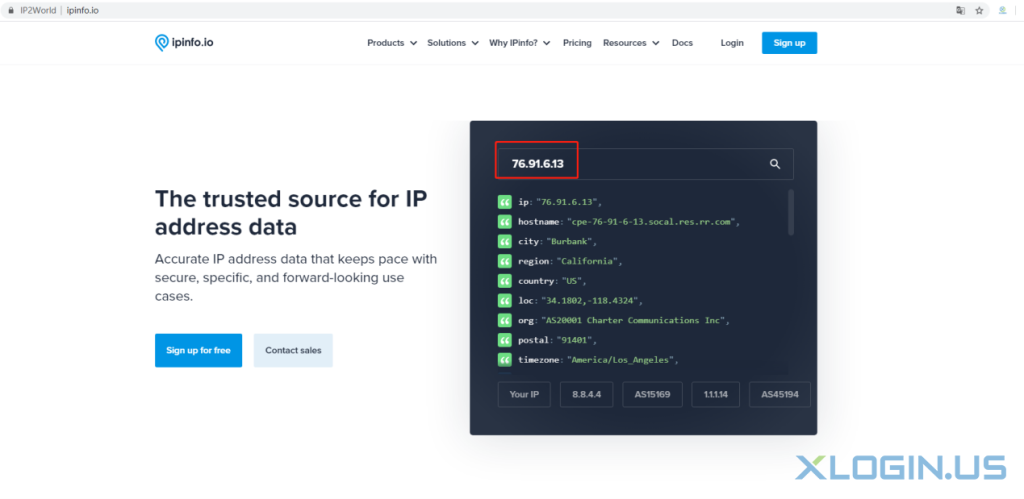
Step 5: Open and log in to the XLogin software, click [+New browser profile] - [setting proxy server], enter the IP and port extracted from IP2World, and click [Test proxy], the proxy IP is consistent, indicating that the proxy is successful. Click [Save] to start using (New users can test 3 days free for XLogin full version).
Rotating Residential Proxy
API Mode
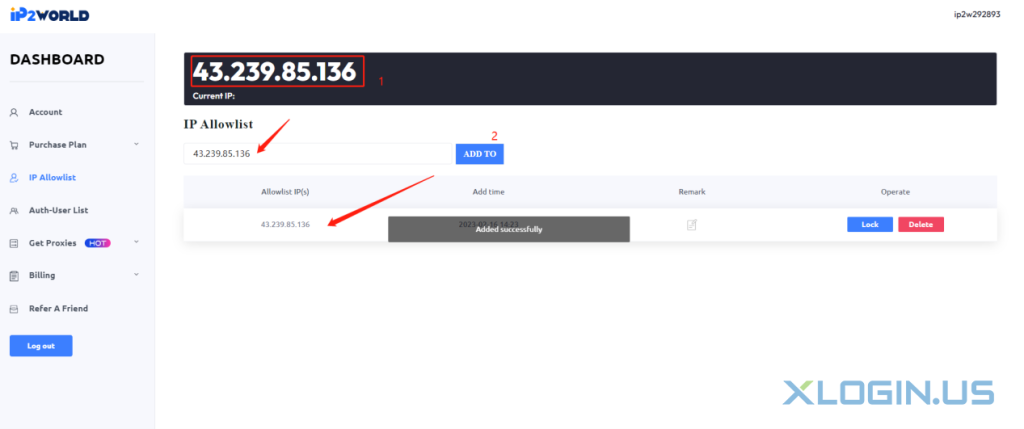
Step 1: Click on the official website, and log in to your IP2World account after registration. Click [IP Allowlist] to copy and paste the current IP into the input box, and then click [Add To], and the local IP will be successfully added to the [IP Allowlist].
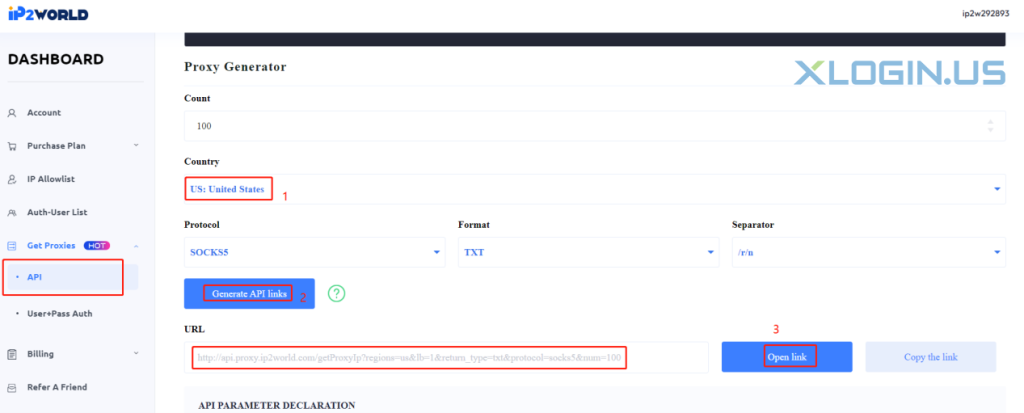
Step 2: In the API mode, select the [Country] (an example is US) and [Protocol] you need, and then click [Generate API Links], copy the API link to any browser, and search for the IP list.
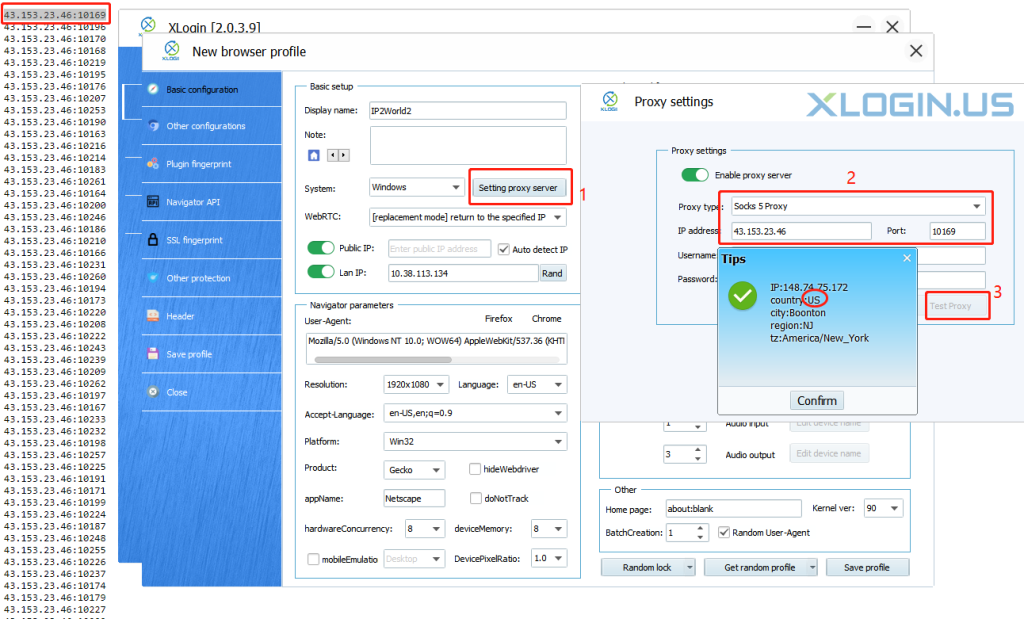
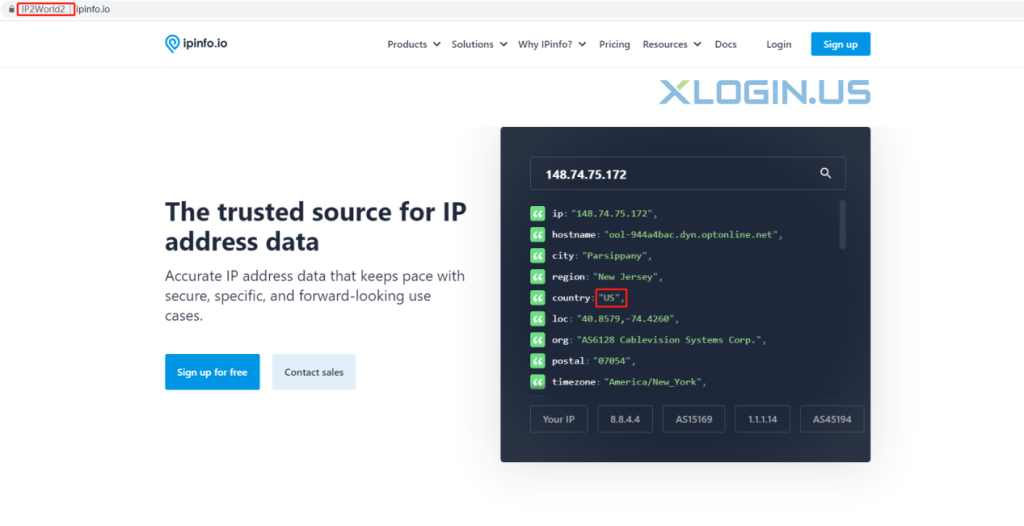
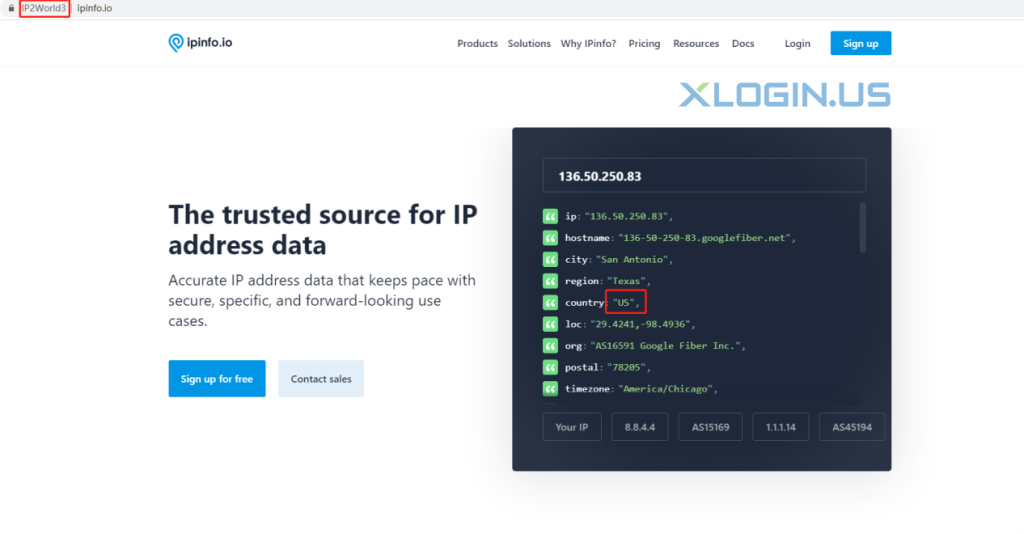
Step 3: Open and log in to the XLogin software, click [+New browser profile] - [setting proxy server], enter the IP and port extracted from the API link, and click [Test proxy], the proxy IP in US, indicating that the proxy is successful. Click [Save] to start using.
User + Pass Auth:
Step 1: Click on the official website, and log in to the IP2World account after registration.
Step 2: Click [Auth-User List] in your dashboard, and then click [Add Users]. Account Status selects normal. You can set the [Traffic Limit] as you like, the example here is 5GB. Then click [Confirm].
Note: The username must contain 6 to 24 letters, digits, and underscores. And start with a lowercase English letter.

Step 3: Click [Get Proxies]-[User + Pass Auth]
In this interface, you can choose the [Country] - [STATE] - [CITY] as you need. Select the username you have created.
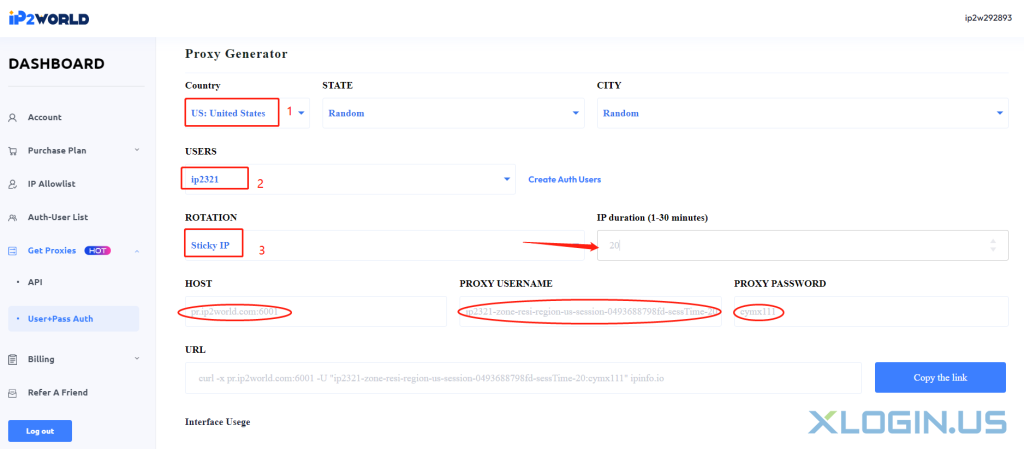
Note:
① If you need to select other cities, please turn off the proxy. After clearing the browser data information, select [Country] - [STATE] - [CITY], and then generate a new [PROXY USERNAME] - [PROXY PASSWORD]
② If you need IP rotation, click [Rotation] - [Sticky IP]. And set [IP duration]. Then you will get your proxy info.
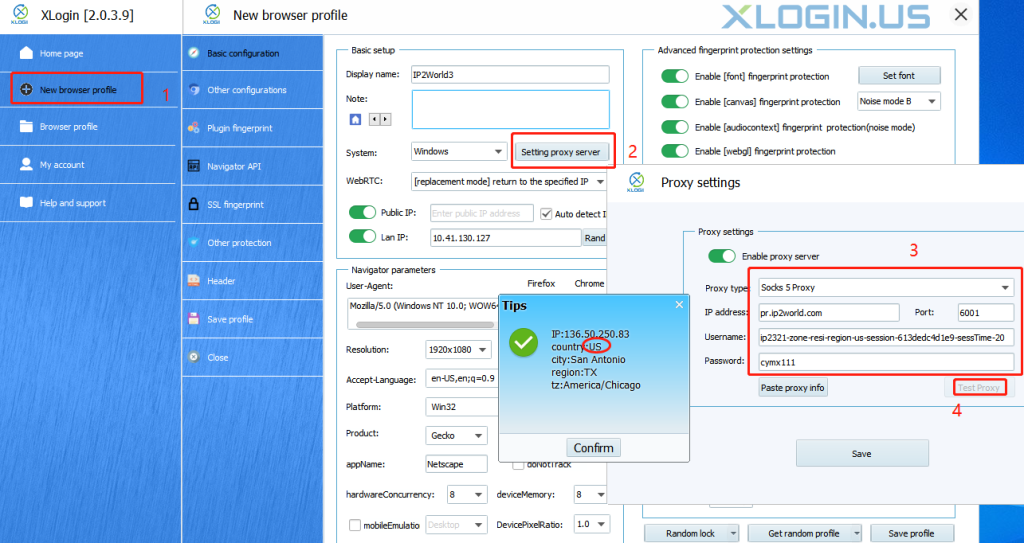
Step4: Open and log in to the XLogin software, click [+New browser profile]-[setting proxy server], enter [HOST] - [PROXY USERNAME] - [PROXY PASSWORD] into XLogin, and click [Test proxy], the proxy IP in US, indicating that the proxy is successful. Click [Save] to start using.
XLogin browser software itself has no proxy IP service, users need to purchase proxy IP from a third party. Proxy-related tutorials are provided by third-party platforms and are not related to the XLogin. Users are strictly prohibited from using XLogin to engage in any illegal and criminal activities, and users are responsible for the relevant responsibilities caused by using XLogin.