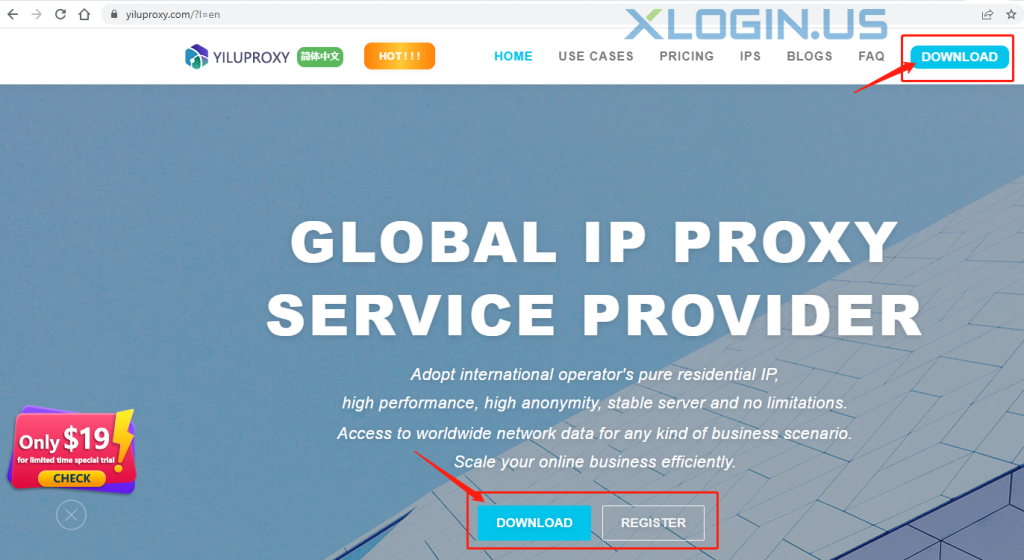
1. Open the YiLuProxy website to register an account and download the client;
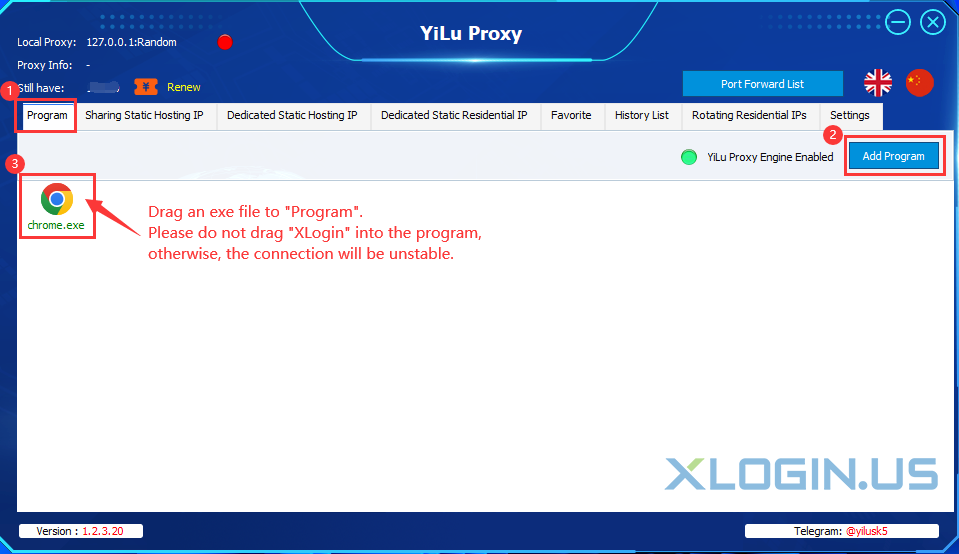
2. Drag an exe file to "program". Please do not drag "XLogin" into the program, otherwise, the connection will be unstable;
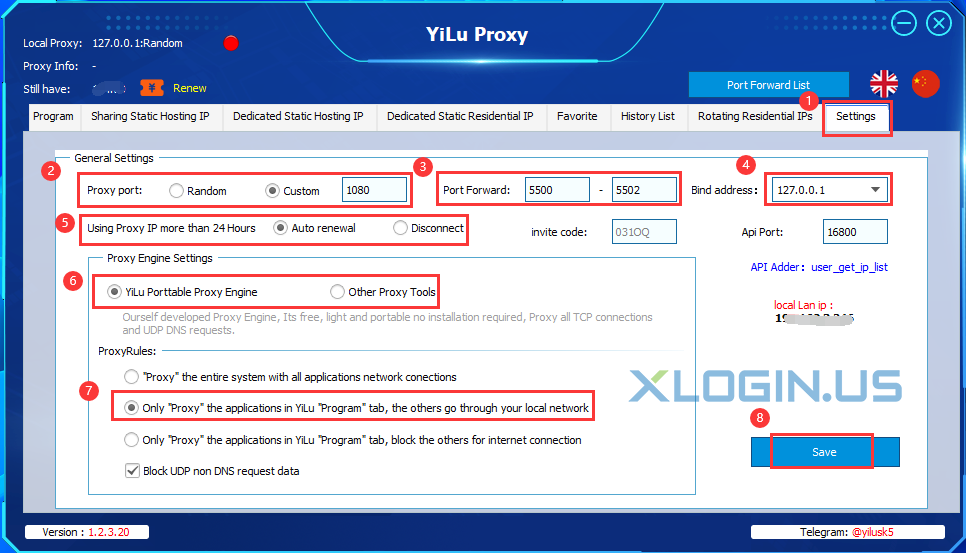
3. Go to the “settings” page to set the settings;
① Proxy Port: Random port or Custom port according to your needs;
② Port Forward: Set the port range. For example, if I want to forward 3 Ips in the different port, I will need to set 5500-5502, then I will have 3 ports to use (5500,5501,5502);
③ Bind address: Choose 127.0.0.1 or 0.0.0.0;
④ Using Proxy IP more than 24 Hours: Choose the “Auto renewal” or “disconnect” for your own needs;
⑤ Proxy Engine Settings: “YiLu Porttable Proxy Engine” or “Other Proxy Tools” are both OK;
⑥ ProxyRules: Select "Only ‘Proxy’ the applications in the YiLu ‘program’ tab, the others go through your local network";
⑦ Set the other settings by default and click “Save”.
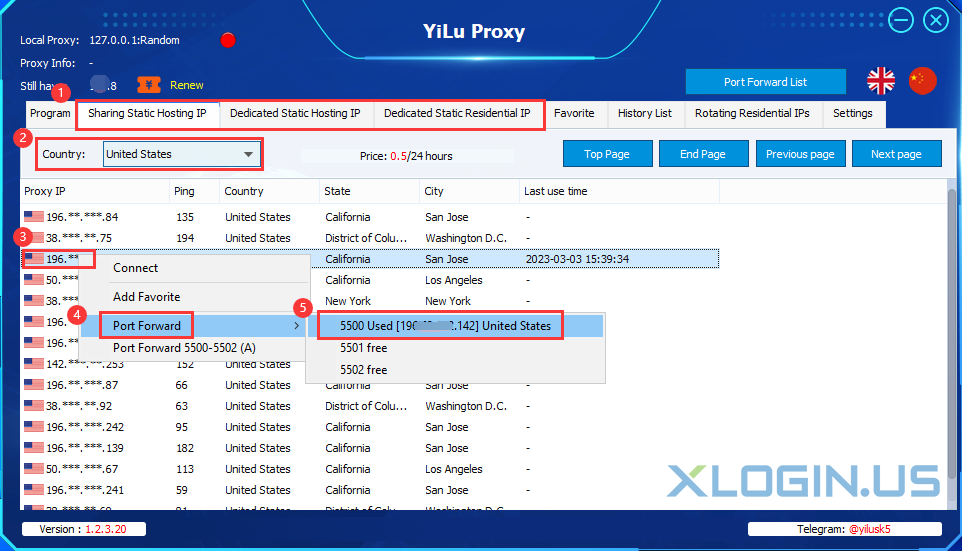
4. Static IP Port forward:
① Sharing Static Hosting IP: Select the Country -> Choose an IP -> Right Click -> Port forward -> choose a port (5500);
② Dedicated Static Hosting/Residential IP: Click “Order IP” to order the IP first, you will see the IP in your Proxy IP list -> Right Click -> Port forward -> choose a port (5501);
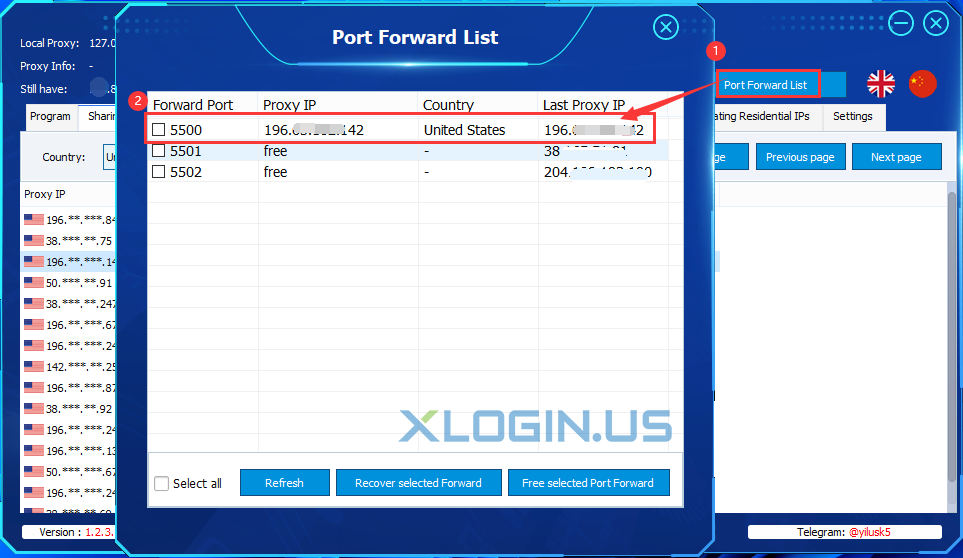
③ Port Forward 5500-5502(A): means you will forward 3 different Ips into these 3 Ports at the same time, YiLu will charge the fee for 3 Ips;
④Used means the port set an IP, Free means it's not set the IP;
⑤ You can check all IP’s information in “PortForwardList” and also can Recover/Free the select forward Ips;
5. Open XLogin client (New users can test 3 days free for full function):
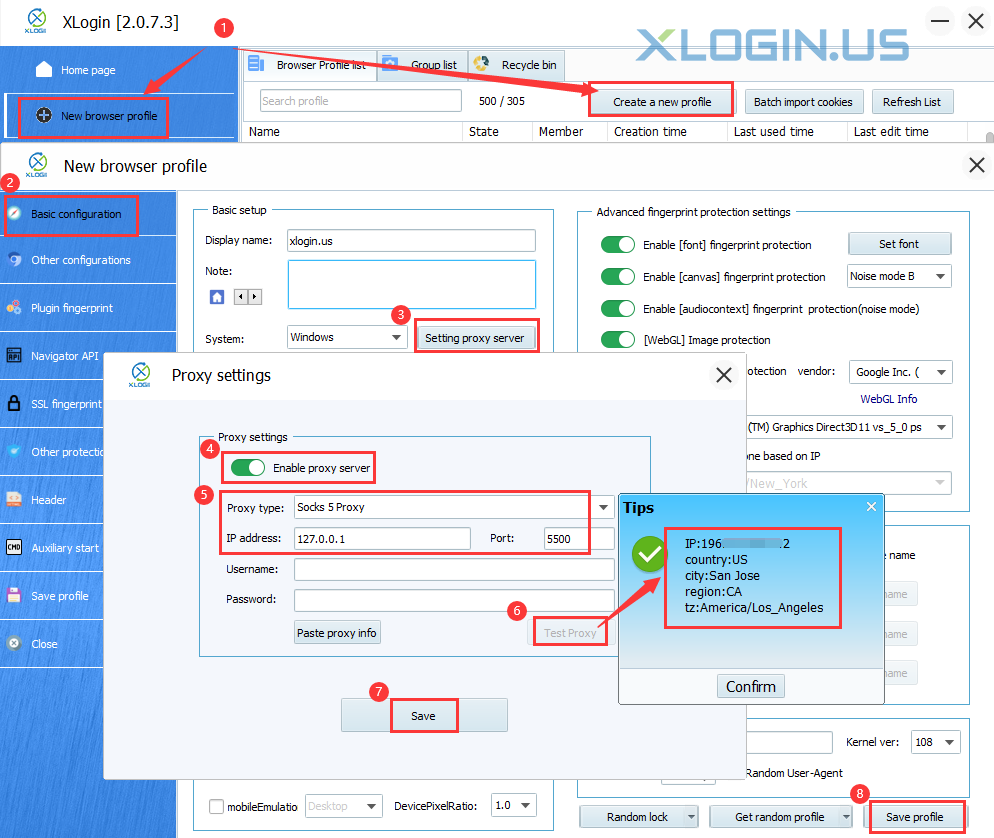
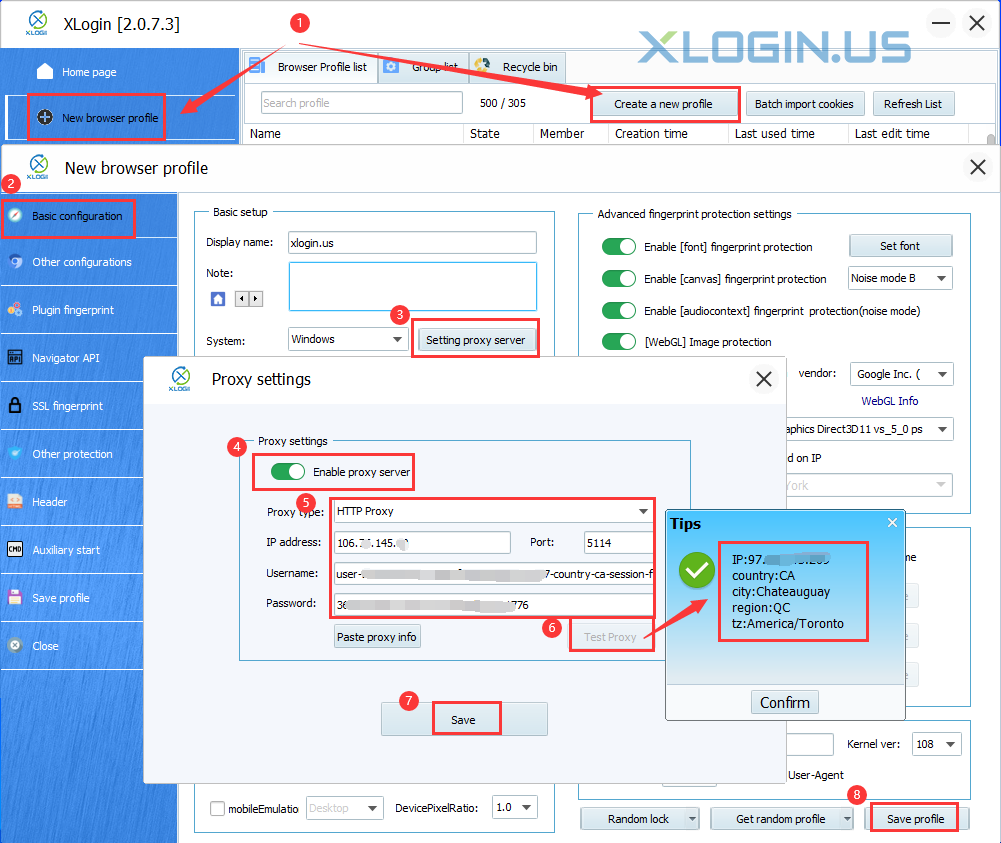
① Click “New browser profile” or “Create a new profile” to create the browser profile;
② Click “Setting proxy server” and enable proxy server;
③ Proxy type: HTTP or SOCKS5;
④ IP address: set 127.0.0.1 as default;
⑤ Port: set the port that you forward on Yilu client(5500,5501 etc.,);
⑥ Username and Password can be empty;
⑦ Click “Test Proxy” and “Save” to save the proxy after successful testing;
⑧ Click ”Save profile” to save the browser profile, then you can open the browser to use.
6. Rotating Residential Ips:
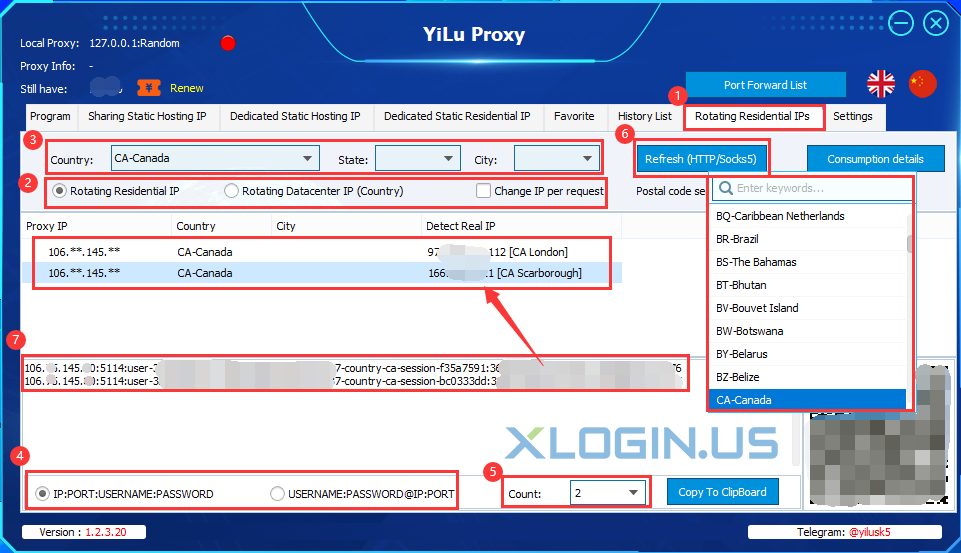
① Click “Rotating Residential IP” or “Rotating Datacenter IP(Country)”;
② Select the Country, State, and City;
③ Select the generated IP format: “IP:PORT:USERNAME:PASSWORD” or “USERNAME:PASSWORD@IP:PORT”;
④ Fill in the count that you need;
⑤ Click “Refresh(HTTP/Socks5)”to extract IP information(HTTP and SOCKS5 are both support);
⑥ All proxy IPs that you extract are the same because it’s the transit server, you can check the “Detect Real IP” to check the real IP you use.
⑦ Copy the “IP:PORT:USERNAME:PASSWORD” to the XLogin profile’s setting;
⑧ Rotating Residential Ips port forward pls refer to the static IP port forward.
Note:
(1) Click “Copy To ClipBoard” to save the IP information locally and it can upload into the XLogin profile in batches.
(2) The user also can extract IP information from “API Adder: user_get_ip_list” on the YiLu “Settings” page.
XLogin browser software itself has no proxy IP service, users need to purchase proxy IP from a third party. Proxy-related tutorials are provided by third-party platforms and are not related to the XLogin. Users are strictly prohibited from using XLogin to engage in any illegal and criminal activities, and users are responsible for the relevant responsibilities caused by using XLogin.