Step 1: Register an account in SX.ORG
!Use promo code xlogin to receive 3GB of proxy traffic for FREE!
In order to create a proxy port, go to the Create New Port tab.
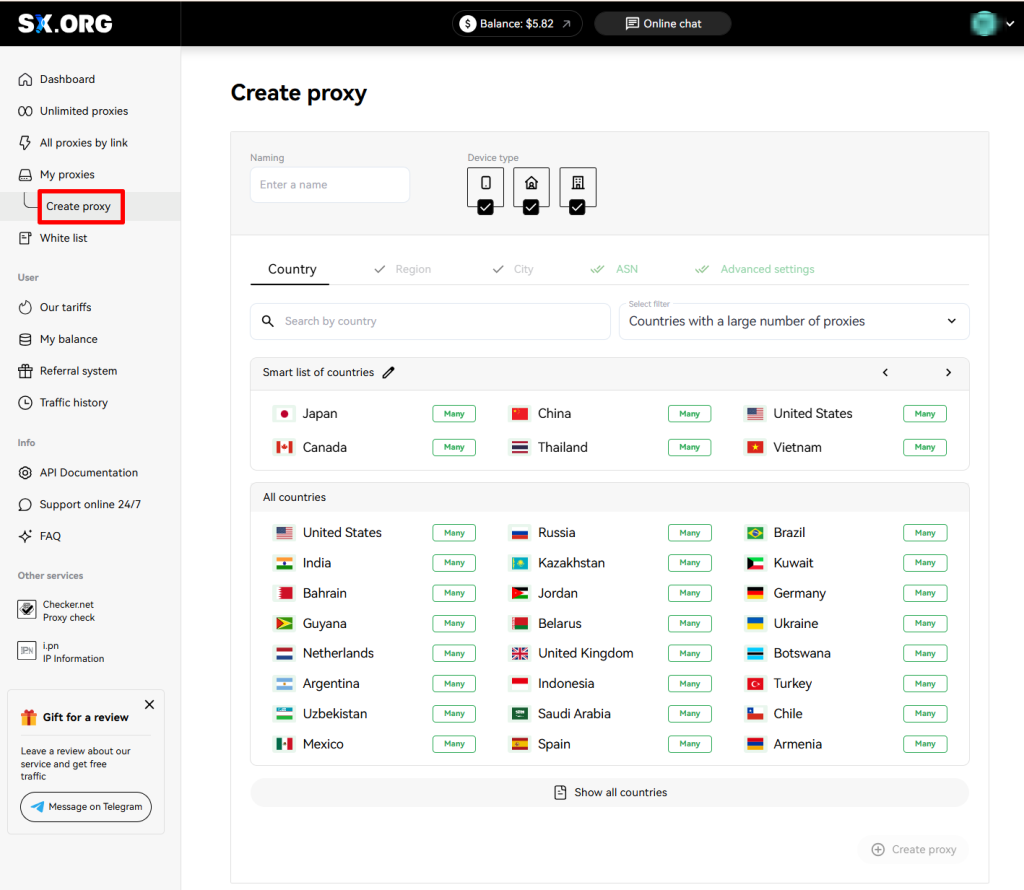
On the first step of creating a proxy, you will be asked to select a country and a proxy type. Above the country selection field you can set the IP type: mobile, corporate or residential (1). Note that all 3 types are selected by default, but for the most stable performance, we recommend selecting only one of those types.
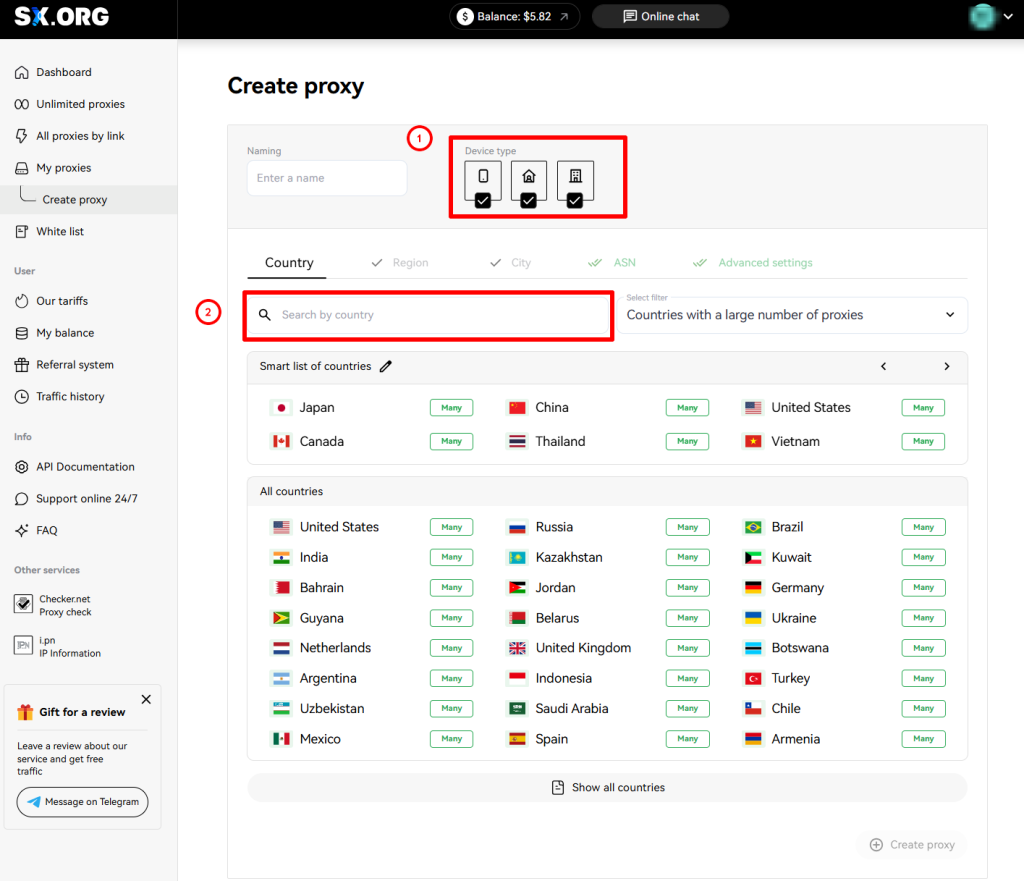
You can find the country you are interested in in the “Country Search” field (2). Just start filling out the name and the dynamic filter will display the most similar results.
After selecting a country, next you can select a region and a city you are interested in. If you don't know in which region the city of your choice is located, worry not, when selecting the city, the region will be selected automatically.
Next you can set the ASN (Internet Service Provider). We recommend leaving this option by default.
At the last step you can choose a name for your proxy, quantity, rotation type and authorization type.
Next, you can choose a type of IP behavior (3).
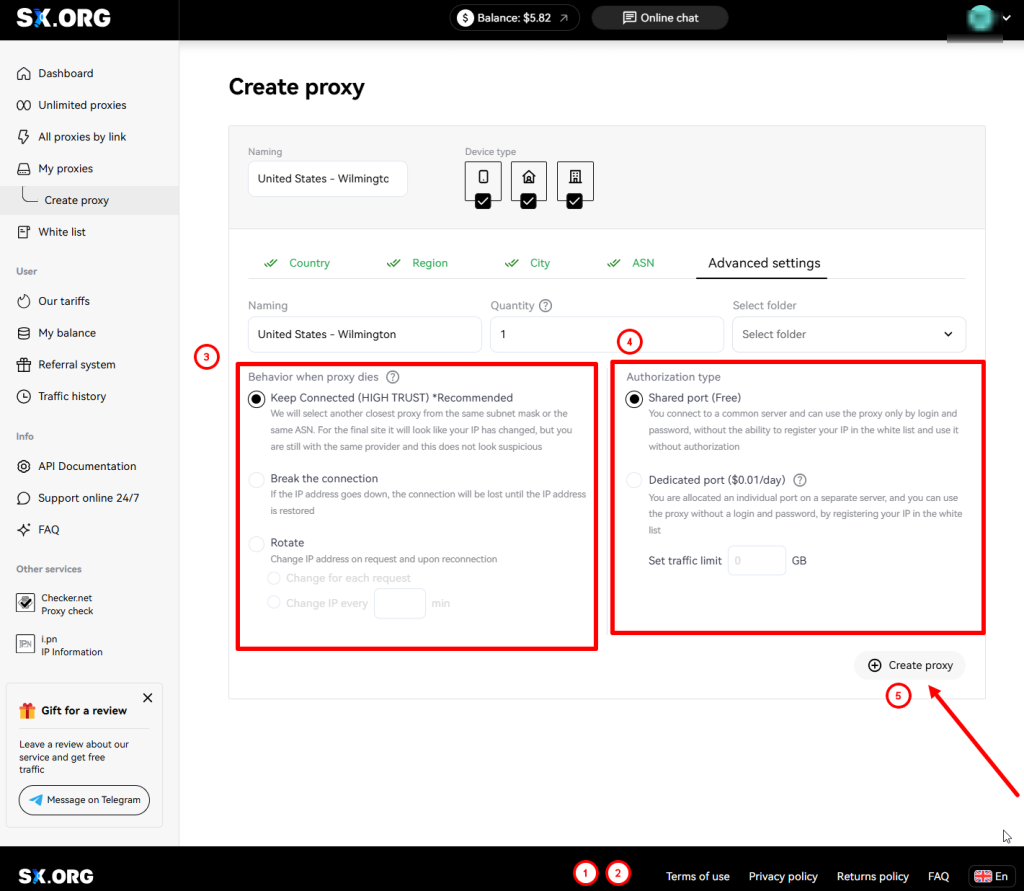
“Keep connection” (default) - if the current IP stops operating, the system will replace it with the closest similar IP of the same subnet or the same ASN.
“Break Connection” - if the IP disconnects, the connection will be halted until the current IP becomes online again.
“Rotate” - with this type of behavior, the IP address is being changed with each request.
And the last step is to select the authorization type (4):
“Login and password authorization only” (default) - the proxy is being authorized by login and password only. Note: IP addresses of devices added to your whitelist cannot be used with this type of proxy.
“Authorization by whitelist or authorization by login and password” - this type of proxy allows you to establish connection via IP:PORT credentials of the proxy, without specifying login and password, as long as the IP address of your device is provided in the whitelist.
*Please note, this option requires a fee ($0.01 for each port of this type on your account will be deducted from your balance once a day).
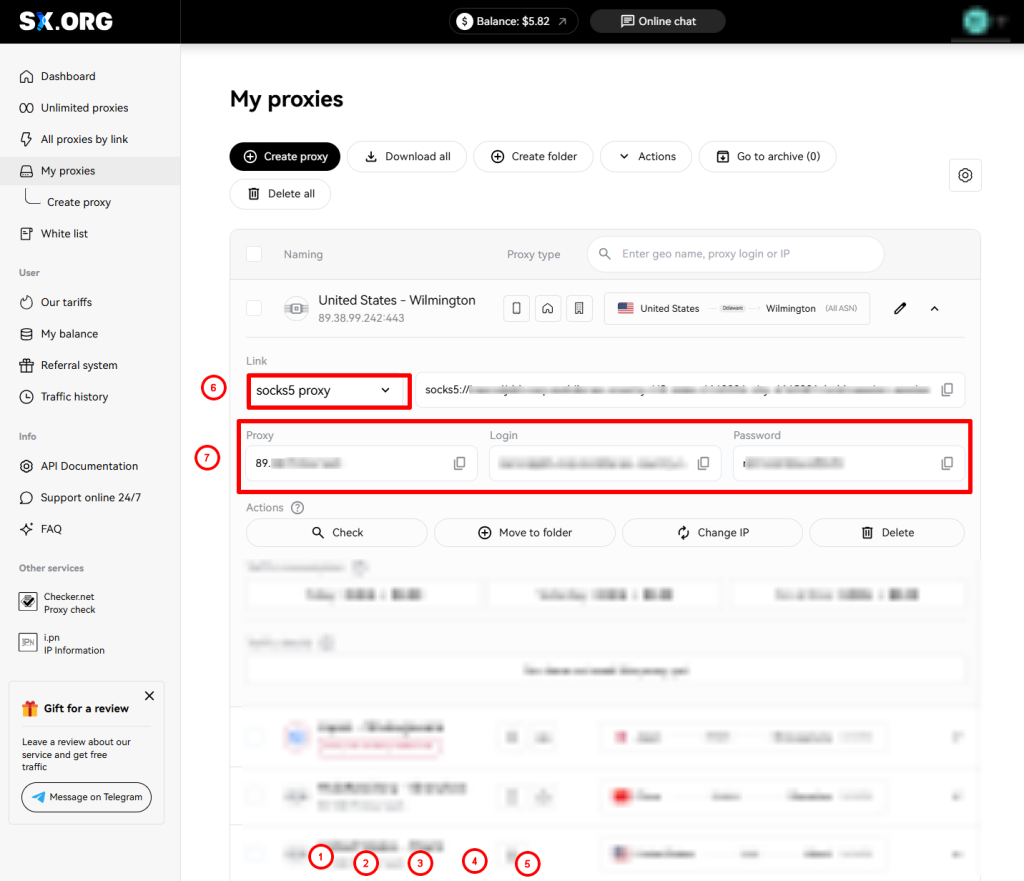
Upon setting all the preferences, click Create Port (5), and the proxy generation will start taking you to the main screen of the My Proxy Ports page.
Now you need to select the proxy type (6)
Next, copy the proxy URL, login and password (7)
Step 2:Open your XLogin app “Support Free Trial”
Open the New browser profile section and find the Setting proxy server section.

Paste the proxy information directly into the appropriate field.
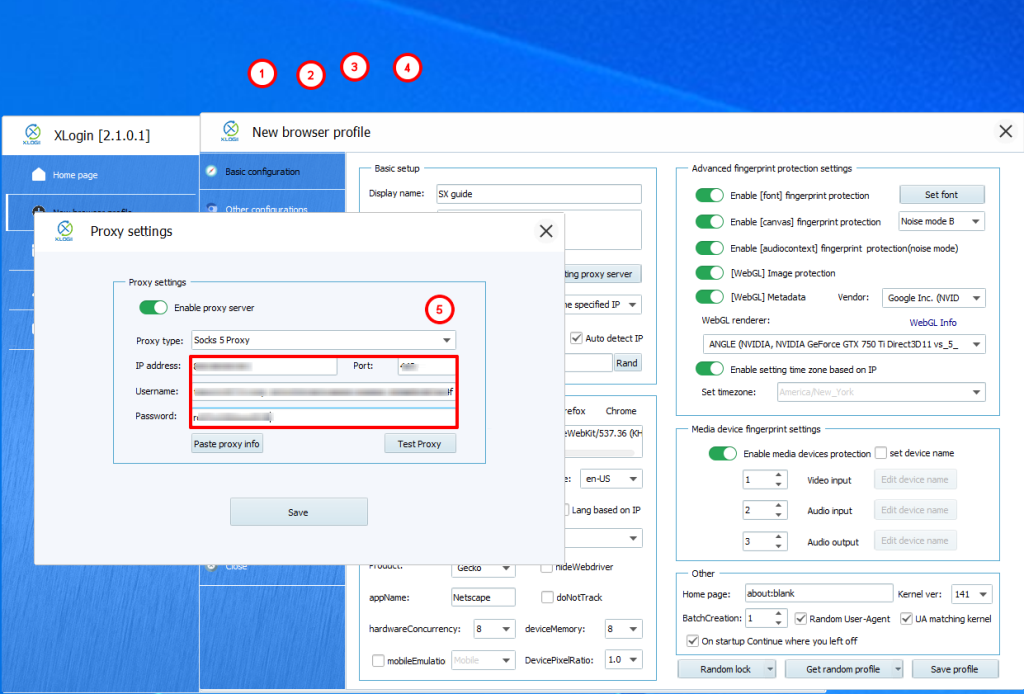
Tap Test Proxy and check the GEO of your IP.
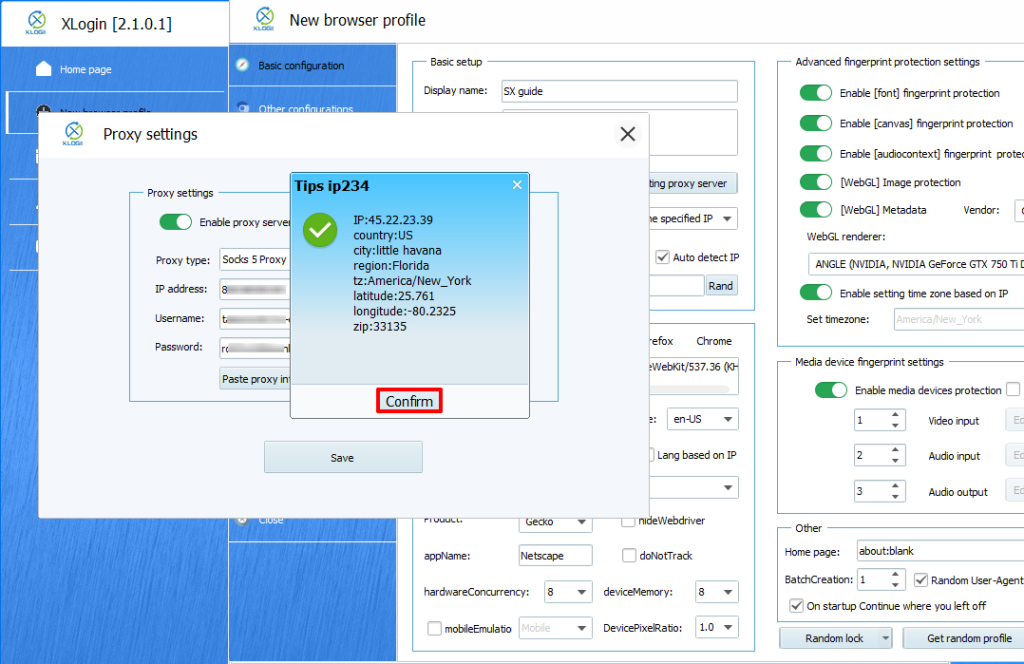
That’s it! You’ve successfully integrated SX.ORG proxies with XLOGIN Anti-Detect Browser and you’re ready to go.
Note: XLogin browser does not provide built-in proxy IP services. Users must purchase proxies from third-party providers. Proxy setup tutorials are offered by these third parties and are not affiliated with XLogin. Any illegal or criminal activity conducted through XLogin is strictly prohibited, and users bear full responsibility for any consequences.